Monday 30 January 2017

More rainbow cards... and a little bit of... Believe it or Not!

Hi there :)

I'm still loving my new stitched rainbow die and since I enjoyed making my card from yesterday so much I decided to go ahead and make a couple more... 'the same but different'.

Here's my card from yesterday:

I was busy putting together my next card when I noticed a cute little dragon that Krystal had coloured with my Zig Clean Color Markers and he was the perfect purple to go with the purple on the rainbow.  Then I decided I needed to add a different sentiment so I die cut 'thinking' from Tim Holtz - Celebration word dies... the 'of you' was from a Hero Arts stamp and die set called Prayers.

The final step was to add some purple rhinestones for the 'tittles' and my card was done.  Here's how it turned out... isn't that baby dragon super cute??

I went through some of the other images Krystal and I have been colouring and found a little duck from the Gerda Steiner - Lucky Duck stamp set.  He seemed to be waving at me so I cut 'HELLO' from my Tim Holtz - Alphanumeric dies.  No rhinestones this time... pretty simple really!

And here's my cards together... have to say I'm pretty pleased with them:

It's hard to believe, but, the school summer holidays are practically over... it's back to school tomorrow and although I'm a little excited there's also a little bit of this going on in my head:

I'm sure it will all be fine when my alarm clock goes off in the morning... I'm sure I won't miss getting into my art studio... LOL who am I trying to convince??

Meanwhile I have a little bit of home stuff to share with you.  We've been having open homes and we've had some good feedback.  One of the things mentioned was that the windows and doors needed a little bit of attention so Michael has been painting them.  He's worked his magic around about half of the house now.

Here's a 'before' picture of one of the window frames... to be honest I'd never really noticed the colour before... I guess I just got used to it over time:

It's kind of a nondescript peachy/creamy colour... but now the windows are looking more like this:

I'm amazed at how much more modern they look!  Michael also installed a new light above the door so it looks really good now!

He also got 'painty' with the back door... love how this turned out!

We don't have a cat but both Toby and Nivea poke their heads through when they get put outside!  I'm also greeted by one of their heads through the cat door when I get home every day...  quite cute really.

The back deck area is looking very smart now too:

It's quite cute that Nivea's dog house matches in with the new paint job too!

And now for some Believe it or Not... or as I like to put it... 'Will the man never learn' files! 

Remember when Michael fell of the ladder/concrete wall because of his jandals?  Well it would seem that he has yet to learn his lesson about wearing jandals up on the ladder... and while I do admire his 'kiwi ingenuity' in getting the window frames painted I do despair of his 'health and safety' abilities... have a look at the photos and you'll see what I mean... about the kiwi ingenuity and the jandals!


Yes that IS Michael up the ladder... wearing jandals... again!


In spite of the fact that he was up the ladder he was still finding it hard to reach a few places but with a little kiwi ingenuity he had an 'extendable paint brush'!


I thought this one was quite clever... using the 'extendable' paint brush from the safety of the deck... and then I came outside to find him doing this:

Oh dear... it seems that I'm in for a long road of dubious safety photos ahead of me!

Meanwhile, the fur babies were not to be left out of the action!  Yesterday I spent quite a long time cleaning down the stair leading to outside... I brushed, washed and scrubbed the concrete steps until they looked really good... and then this morning 'someone' did this:

Michael said it was Toby... but I suspect Nivea did her fair share of digging and dirt spreading as well!

So that's it for today... back to school tomorrow so I think I might head down into my art studio for the afternoon.  Thanks for visiting the blog today xx

Sunday 29 January 2017

I love you rainbow card - NBUS Challenge #9

Hi there :)

I decided to do a second card for Darnell's NBUS challenge #9.  You can see my first card HERE.  You'll probably remember that NBUS stands for Never Before Used Schtuff... basically it means to use schtuff never before used (virginal) on your creation. It can be something you've had for years or something you got yesterday.

My NBUS item is this really cool die that arrived in the mail on Thursday:
My Favorite Things - Stitched Rainbow Die-namics
An optional extra challenge was to do a bit of CASEing... (Copy And Share Everything).  I copied this next piece straight from Darnell's blog:

  • Note: The most essential element to CASEing is that you give the original artist credit. If you don't know the artist because you found the card you are CASEing on Pinterest, etc., then include a link to your source.
I had seen a card on pinterest using a rainbow die similar to this which I really liked.  This card was made by Toni.  I quite like her blog and recommend it if you're a card maker.

So... with my new rainbow die in hand and a photo for inspiration I got ready to create.  Toni used a cloud embossing folder to create her background but I did something a little different.  In my Lawn Fawn - Blue Skies die set there are a couple of puffy cloud dies that I thought would be perfect for the background.  

I die cut lots of the clouds from watercolour paper and made sure that I had some going off the edges.

Then I got to work on my rainbow.  I started off by die cutting the rainbow from watercolour paper:

Then I separated each arch from the rainbow and coloured them using my Peerless Watercolours.  My rainbow die cuts one less arch than Toni's so I just combined the indigo/violet into one.

I dried the pieces with my heat gun and then reassembled the rainbow... love how it turned out.

Since I had the stitched lines in the rainbow I decided to use my Lawn Fawn - small stitched rectangles die to die cut the cloud background.  (Sorry I forgot to get a photo of this stage).  Then of course I wanted the edge of the rainbow to have the same stitching so I lined it up carefully and used some Micropore tape to hold the rainbow in place so that I could run it through my Big Shot.

Before I adhered my rainbow to the cloud background I did the colour runs using the same colours I'd used to watercolour my rainbow.  Peerless Watercolours: Red (Scarlet Lake), Orange (Deep Yellow), Yellow (Daffodil Yellow), Green (Grass Green), Blue (Alice Blue) and Purple (Amethyst)

Then I lined up my rainbow and adhered it using foam dots to give it a bit of height.

Next I layered my card front onto some black leather-textured cardstock and die cut a sentiment using Lawn Fawn - I Love You Border die from the same black cardstock.

For the finishing touch I adhered a tiny red rhinestone for the 'tittle'... yep that's the fancy name for the dot above the i!

Side note: My mum came over for a visit on Friday/Saturday and I was showing her the Quick Stick tool.  She was totally amazed at how easy it was to use... especially when she saw me stick down a tiny rhinestone with no issues at all... so off we went to Warehouse Stationery and now she has her own Quick Stick... I'm such an enabler LOL

Here is my finished card for Darnell's challenge:

Thanks so much for stopping by today xx

Wednesday 25 January 2017

We're having a grandbaby!

Hi everyone :)

I've been sitting on this wee snippet of news for what seems like forever... but in reality is only since mid-November... 17th November to be exact :) 

I was at work the day I found out when I got a text...

So my phone rang and Miss Mikayla told me what I already suspected... I was going to be a Nan!  I was initially quite speechless... and for those that know me in 'real life' that's quite unusual LOL  I spent most of the day replaying the conversation over in my head and then I went to the hospital to visit Krystal and told her.  By the time I actually got home I was feeling a little bit excited about having a grandbaby... and several weeks on I'm super happy about it!

Michael is also excited about being a grandfather although he thinks I need to propose and marry him before the baby's arrival so that he will be a 'real' grandad LOL  We're also still discussing what the baby will call him.  We've been through the list:
  • Grandad... nope
  • Pop... nope
  • Gramps... nope
  • Grumps... ha ha ha not funny!
  • Opa... nope 
  • Grootvader... (Dutch for grandfather) this was Michael's suggestion but we said nope!
Then Michael thought of one he REALLY liked and he text Mikayla.  A minute later I got a text back saying... Sorry  Michael, don't think that's gonna happen

So what was Michael's idea... 'G DADDY'

I really did have to laugh at that one... I think he was trying to be funny but he still mentions it on a fairly regular basis!

Several weeks on I have been spotted visiting baby shops and possibly even buying the odd item... or two or three :)  Baby is due in July and thankfully for me is actually due during the school holidays so hopefully he or she will arrive in time for me to have cuddles before going back to school!

Now we're all waiting to find out if we're having a grandbaby girl or a grandbaby boy... super exciting!


p.s. Since I was working on my 30 Days of Thankful album when we found out about the grandbaby I added one more page to my album which I haven't shared on my blog until now:
 So that's my news... thanks so much for stopping by xx

Tuesday 24 January 2017

A NBUS challenge!

Hi there :)

My post today is for Darnell's NBUS Challenge #9.  (Never Before Used Schtuff)... basically it means to use schtuff never before used (virginal) on your creation. It can be something you've had for years or something you got yesterday.

As an extra optional theme Darnell also challenged us to use CASEing, (Copy And Share Everything).  I copied this next piece straight from Darnell's blog:
  • Note: The most essential element to CASEing is that you give the original artist credit. If you don't know the artist because you found the card you are CASEing on Pinterest, etc., then include a link to your source.
http://www.djkardkreations.com/2017/01/nbus-challenge-9.html

I was in my craft studio yesterday creating some cards that fit this challenge PERFECTLY... inspired from someone else's work AND using something brand new to my stash!

When I'm purchasing new products I usually see the product and instantly have ideas for how I'd use it but with this purchase I actually saw a finished card and said... I HAVE to buy that die!  Here's what inspired my purchase and my CASE'd card:
 
From Simon Says Stamp


I ordered this die as soon as I saw it because I really love this card (although nobody is credited with it on the Simon Says Stamp website).  I loved all the background colours and I instantly thought of using Distress Inks to create a similar look.

I got so busy playing around with different things that I forgot to take any photos at all but here's what I came up with using Distress Inks for the background.  I also added tiny coloured rhinestones to the flower centers  and the sentiments were cut from black cardstock using  Greeting Top Edgers dies from Impression Obsession.


In all honesty, this die does all the work for you!  It's a fabulously quick way to make a stunning card! Here's a better look at the die:

After making a couple of colourful cards I started thinking about making something a little more stylish and here's what I came up with:

I LOVE how glittery that silver cardstock is and it photographs so beautifully.  All I did was run the black cardstock through my Big Shot with my Lawn Fawn stitched rectangle die.  Then I ran it through again with the Heart of Flowers die.  Next I adhered my piece of silver glitter cardstock underneath and added it all to the front of my card.  Finally I added some clear rhinestones to the flower centers and heat embossed a sentiment.  Super simple but really stunning in real life.

Here's a group shot of my afternoon's work:

Thank you Darnell for the challenge... I totally loved participating :) 

Thank you for visiting my blog today xx

Sunday 22 January 2017

Happy Anniversary to us :)

Hi there :)

January 21st this year marked our 2nd anniversary and I decided to make Michael a card to celebrate.  I had seen a really cute card online that I thought I could adapt a bit to fit the occasion and they do say that imitation is the sincerest form of flattery.  Here's the card that inspired me:
Card by Tara Sell
Tara has a great eye for design and she also creates crafting videos which she shares on her blog.  I watched her video showing how she made this particular card and she explained it all so well that my card came together very quickly.

I made my card using watercolour paper so that I could use my Zig clean colour markers and I'm really pleased with the results.  Here's my wee squirrel with his acorn from Gerda Steiner Designs Happy Fall (yes I had exactly the same stamp and die sets as Tara LOL)

Since this card was for our anniversary I got out my Tim Holtz Celebrate dies and die cut 'happy anniversary'.  I even remembered to use some Stick It to the back of my cardstock before die cutting the words so they were super easy to place where I wanted them.

On the outside I followed exactly what Tara had done on her card/video using the My Favorite Things - Trees in the Forest die.  I cut the 'hole' in the front of my card with My Favorite Things - Starry Circle die.

I really like the idea of the trees and the hole on the card front and I've got plans to do more of this type of card!

I stamped the 'oops' sentiment from the Happy Fall stamp set onto black card and embossed it with white embossing powder. 

It makes more sense with the cute wee squirrel peaking through the hole:

And here's the finished card:

Michael really loved the card and it's now sitting up on the mantle above the fireplace.  He's quite sentimental about things like this so it was nice to do something really special for him.

We had decided to go out for dinner last night to celebrate our anniversary and after much talking about 'where' we would go Michael came up with an idea... rang ahead and booked a table so it was all a bit of a surprise. 

We ended up going to Stratosfare Restaurant at the top of the skyline mountain... super cool.  We arrived at the restaurant via a gondola ride which was very cool... and the ride back down in the dark was even better... we could see the city lights spreading out for miles... truly gorgeous!

I have to admit that I was quite taken with all the lighting... those shades are phenomenal... although probably a bit much for our lounge LOL

While we were having dessert one of the waitresses brought over a tiny little cake covered in chocolate ganache, complete with a wee lit golden candle...  mini pink meringues and the chef had also written 'Happy Anniversary' in chocolate on the plate... so special.  We were then presented with a card from the staff at Stratosfare... we were totally blown away by it all.  What fantastic customer service!  They certainly took our celebration up a level!

So that was our anniversary... definitely a special celebration :)  Thanks so much for dropping by my blog today xx

Saturday 21 January 2017

Mermaid cards

Hello :)

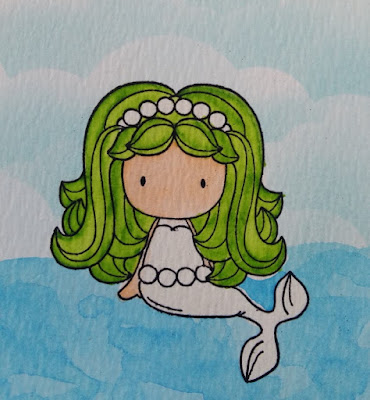
I've been having some fun in my art studio designing mermaid cards.  It all started when I found a stamp I'd had in my stash for YEARS.  Within minutes of finding the stamp ideas started flowing and I just had to go with it and here are the results.

I started out with this stamp from Sugar Plum Stamps.

I didn't take all the step by step photos I usually do because the design was buzzing around in my head but I think I got most of the steps.  I decided to do a set of four cards so I stamped all the mermaids with black ink and then heat embossed them.

I knew I wanted to do a watercoloured background so I painted over my stamped image with masking fluid and then I left it alone to dry.

When the masking fluid was dry I started on the water.  I used the wet-on-wet technique to paint in the water using Salty Ocean and Mermaid Lagoon (how appropriate!) Distress Inks.  I also did an extra piece of watercoloured card using the same technique... trust me, it will make sense later on!

Then it was time to add some colour to the sky.  I die cut some masks using Lawn Fawn Puffy Cloud Borders from regular card and then I used Tumbled Glass Distress Ink and a round blender to create a sky background.  It's the first time I've used this technique and I really like the effect.

Meanwhile... it had started to rain and Toby and Nivea wanted to hang out with me, so I brought their beds down to the art studio.  Then Nivea decided that running around in the rain like a loon was right up her alley!  Even though Toby had access to his big bed he decided to squeeze himself into Nivea's bed and then look at me as if to say... this bed isn't big enough for me... silly boy!  I couldn't resist getting a photo of him!
 

Right, back to the cards. The next step was to unmask the mermaid... I never get tired of seeing the design being uncovered!

I had an idea for making waves out of velum using my Mama Elephant Ocean Waves Trio dies.  The only problem was I couldn't find my velum anywhere!  It turns out that it's not so easy to get anymore.  Spotlight didn't have any... neither did the emporium art supply stores... neither did Warehouse Stationery.  In the end I bought some translucent tracing paper.

I got my dies out and cut the waves from the tracing paper.  Then I cut the tops of the waves from white cardstock using the same dies and stuck them to the inside of the waves and I love how it came together.

Once I had the wave idea sorted it was onto the colouring.  I used my Zig clean colour markers to colour in the images along with my waterbrush to smooth out the colours.  I got inventive with the colouring and did each mermaid in different colours and with super bright hair.  Here's a few images to give you some ideas of what I was working on.


At this point I got so carried away with the colouring and making the waves that I actually didn't take any photos!  I did manage to get photos of the gorgeous sequins and things that arrived in the post the other day which I now have in little glass jars... LOVE LOVE LOVE!  I used some of these delightful little goodies to add a splash of magic to my cards.

Here they are waiting for the sequins to dry overnight.  Have you spotted the blue wave in the front?... that was made using the extra piece of watercolour background from the start of this post.

This morning I took my cards outside to get good photos of them...


I have to admit that the mermaid with pink hair is my personal favourite!  Do you have a preference?

Here they are all together:

Thanks so much for dropping by my blog today xx