Showing posts with label Simon Says Stamp. Show all posts

Tuesday, 24 January 2017

A NBUS challenge!

Hi there :)

My post today is for Darnell's NBUS Challenge #9.  (Never Before Used Schtuff)... basically it means to use schtuff never before used (virginal) on your creation. It can be something you've had for years or something you got yesterday.

As an extra optional theme Darnell also challenged us to use CASEing, (Copy And Share Everything).  I copied this next piece straight from Darnell's blog:
  • Note: The most essential element to CASEing is that you give the original artist credit. If you don't know the artist because you found the card you are CASEing on Pinterest, etc., then include a link to your source.
http://www.djkardkreations.com/2017/01/nbus-challenge-9.html

I was in my craft studio yesterday creating some cards that fit this challenge PERFECTLY... inspired from someone else's work AND using something brand new to my stash!

When I'm purchasing new products I usually see the product and instantly have ideas for how I'd use it but with this purchase I actually saw a finished card and said... I HAVE to buy that die!  Here's what inspired my purchase and my CASE'd card:
 
From Simon Says Stamp


I ordered this die as soon as I saw it because I really love this card (although nobody is credited with it on the Simon Says Stamp website).  I loved all the background colours and I instantly thought of using Distress Inks to create a similar look.

I got so busy playing around with different things that I forgot to take any photos at all but here's what I came up with using Distress Inks for the background.  I also added tiny coloured rhinestones to the flower centers  and the sentiments were cut from black cardstock using  Greeting Top Edgers dies from Impression Obsession.


In all honesty, this die does all the work for you!  It's a fabulously quick way to make a stunning card! Here's a better look at the die:

After making a couple of colourful cards I started thinking about making something a little more stylish and here's what I came up with:

I LOVE how glittery that silver cardstock is and it photographs so beautifully.  All I did was run the black cardstock through my Big Shot with my Lawn Fawn stitched rectangle die.  Then I ran it through again with the Heart of Flowers die.  Next I adhered my piece of silver glitter cardstock underneath and added it all to the front of my card.  Finally I added some clear rhinestones to the flower centers and heat embossed a sentiment.  Super simple but really stunning in real life.

Here's a group shot of my afternoon's work:

Thank you Darnell for the challenge... I totally loved participating :) 

Thank you for visiting my blog today xx

Tuesday, 10 January 2017

Finally... a card making tutorial!

Hi there :)  It's been AGES since I've shared a card making tutorial and for some reason I've got the urge to share today.  I actually made this card back in November and although I had the very best of intentions giving it away I just couldn't bring myself to do it so it's still sitting on my craft table... but it DOES make me smile :)

Before I start I want to say that all the links for the products will take you to the Simon Says Stamp  website because that's where I get a lot of my supplies.  It's getting harder and harder to buy anything I want in New Zealand now which is such a shame but I do buy local when I can.

The inspiration for this card came from something I'd seen on the internet by Laura Bassen... super loved her card so I had to give it a go myself.

For this card I used Simon Says Stamp Warm Christmas Wishes stamp set and the Warm Wishes Die set.


I've been playing around with my stamps and dies to see which way I prefer to do it... die cut and then stamp or stamp and then die cut.  I've found that what works best for me is to stamp and then die... it just seems to work better (and quicker) for me... especially if I'm also heat embossing the images (which I tend to do most of the time).

I started off stamping all my images onto Tim Holtz Watercolour cardstock with black Hero Arts Dye Ink and then heat embossing all the images with Ranger Clear embossing powder.  

Next I got out my Zig Clean Color Real Brush Markers... I LOVE these markers!  I've quickly become a HUGE fan of them.  They're so easy to use... love the range of colours... and totally love the way they blend with water and each other to create a super smooth look.  Plus they're really VIBRANT!  I feel like I get the look of Copics with the ease of watercolour... and that works for me!

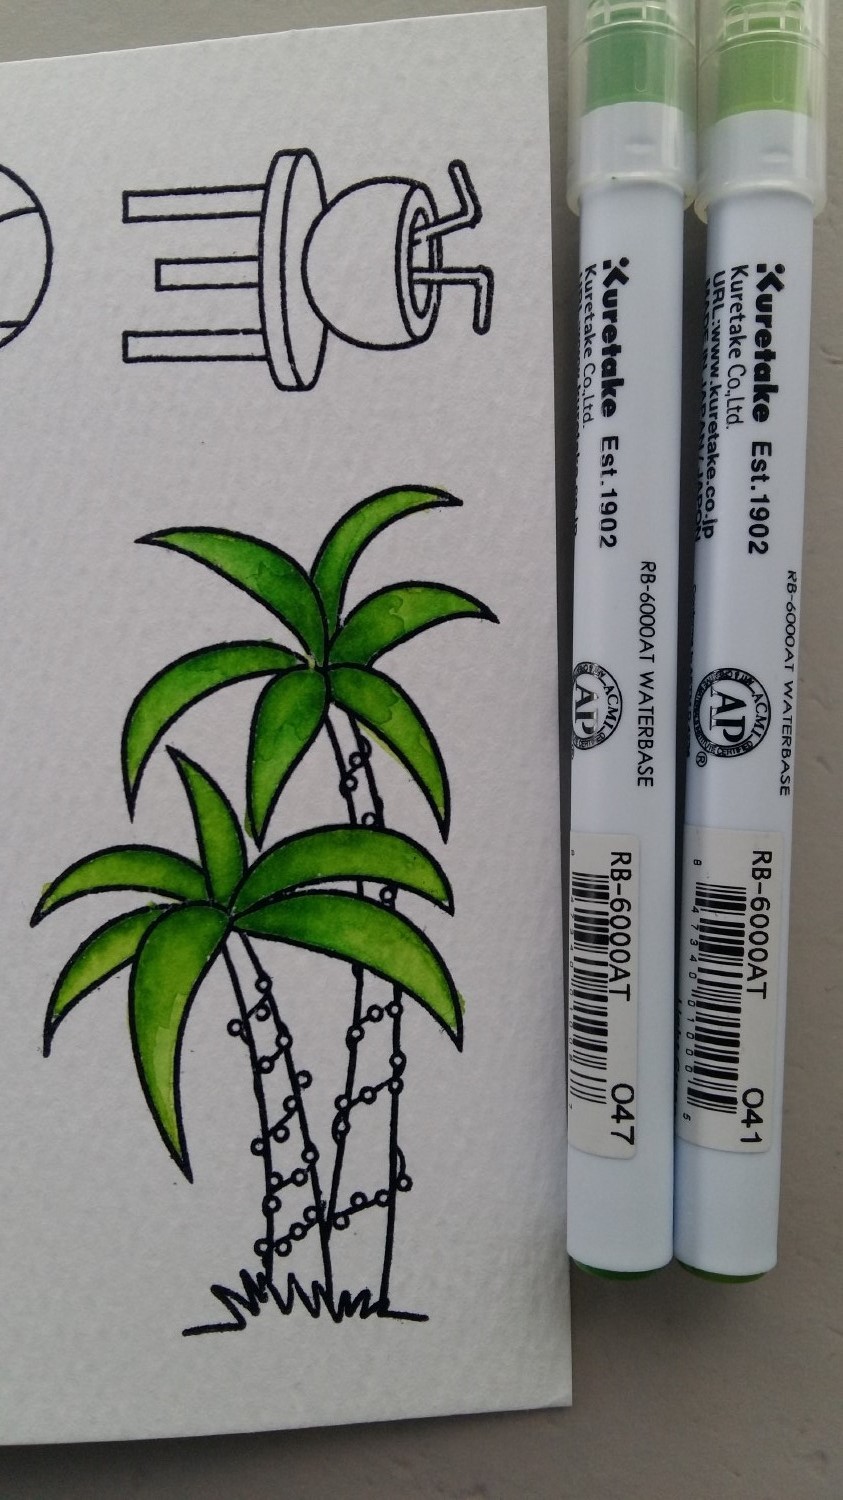
I started off colouring the palm leaves with 041 Light Green & 047 May Green. I also did some of the surf board and beach ball with these colours.

Next I used 032 Persian Blue & 050 Yellow to add some colour to the surf board, beach ball and Santa's boxer shorts.

Since I was on a roll with my colours I decided to add a real rainbow effect to the rest of the beach ball and surf board with 070 Orange, 027 Dark Pink, 024 Wine Red & 080 Violet.

Next came the trunks of the palm trees with 060 Brown & 068 Deep Brown.

While I was working with the browns I did the table in 068 Deep Brown & 062 Dark Brown.

I was starting to get the hang of the colouring techniques by now so I started on Santa's face with 071 Flesh Color. 

For Santa's hat I used 260 Deep Red & 024 Wine Red. 

For the rest of Santa's boxer shorts I used 042 Turquoise Green & 033 Persian Green.

I wanted to leave Santa's singlet pristine white so I decided to add a little bit of colour to his beard using 097 Pale Gray. 

And since it was Christmas I HAD to add a little bit of glitter to Santa's hat with my Wink of Stella pen. 

After all that I decided that Santa really needed some sun classes to protect his eyes from the UV rays so I stamped and embossed some glasses on a scrap of  watercolor paper and then I used 031 Cobalt Blue and 036 Light Blue to colour his lenses and some 090 Gray to colour the frames.

Then it was time to start assembling the card.  I cut a piece of 'sand' from watercolor paper using Mama Elephant Borderlines Trio dies.  I added a base of colour using Antique Linen Distress Ink.

To help me create the 'sand' effect I used Antique Linen, Old Paper and Scattered Straw Distress Markers along with my Spritzer Tool.  I really love how the 'sand' turned out!

To create the horizon and sky I used Cracked Pistachio & Peacock Feathers Distress ink and blended them together creating a more intense blend along the horizon line.

Then it was time to put my two background pieces back together again.

A few months ago I saw the Mama Elephant Jingle Greetings stamp set and I knew I HAD to buy it so I used one of the sentiments along with some Ranger Liquid Platinum embossing powder.  I really love how the sentiment turned out!

Then came the fun of assembling all my coloured images on the card.  I got so caught up in what I was doing that I didn't take any photos but I can tell you that some things are flat on the card and some have been adhered with foam tape.

And here's my final card (click on the photo to get a closer view):

I'm still really happy with how it turned out... maybe I'll be ready to part with it for Christmas 2017!

Miss Krystal (24) said to me yesterday that I need to think about doing video tutorials... apparently that's 'where it's at' now.  What do you think... photo or video tutorial?  I'm not sure if my kiwi accent is ready for the internet LOL

Thanks so much for visiting xx

Saturday, 28 May 2016

Miss Krystal is 24 today!

Today my 'big girl' celebrates her 24th birthday!

Krystal's birth was actually quite eventful.  My ex-husband and I had just bought our first home and moved into it.  I knew I was supposed to take it easy since I was so late in my pregnancy but I figured that if I got everything sorted out for the 'baby' (we didn't know if we were having a boy or a girl) then I could rest and take it easy once everything was done.

We moved into our home and spent all weekend rushing around organising things and getting boxes unpacked... and then the baby stopped moving!  I was ordered to go home and put my feet up... which I actually did!... but by the next afternoon there were still no movements from baby so my midwife said that I needed to go to the hospital to monitor baby's heart beat.

After several hours on the monitor it was decided that it would be best if baby came early... she was actually due June 16th!  They induced me and we got ready to be parents.  Mum and my two younger sisters arrived during the labour.  After saying I didn't want Mum in the delivery room all through my pregnancy she arrived at the hospital to hear me say she could come in.  Little did I know that one of my sisters actually watched the entire labour and birth from the window in the hallway!

Just after midnight my youngest sister called out from the corridor that 'if I waited 24 more hours the baby could be born on HER birthday'... and I remember yelling back to her that 'I didn't want to wait 24 more minutes let alone 24 more hours!'

As it was, Miss Krystal was born just after 1.30am and she and my sister have been 'almost twins' ever since LOL

Here's a very early photo of Miss Krystal (I think she was just a few weeks old):

Krystal has always loved girly, pretty things... along with anything sparkly, pink or purple so I decided to try and make her a special card to celebrate her special day.

I have to admit that I stamped and coloured a couple of images onto scrap watercolour paper first but wasn't entirely happy with them before I finally settled on my card design.

I picked a piece of patterned paper from Kaisercraft's 'After Five' collection.  I really liked the varnished feel of the paper and it was super neutral in terms of colour.  I die cut the card front using my Lawn Fawn stitched rectangle dies and then used some of the left over paper to die cut the word 'birthday' using Tim Holtz Celebrate dies.

Then I used the die cut 'birthday' to help me place the 'happy' stamp.  This stamp comes from Simon Says Stamp and it stamps perfectly every time.

The next job was to place the stamp for the flower stalk.  I decided to use Simon Says Stamp's Spring Flowers set.  I bought this stamp because it was so pretty but hadn't actually used it yet so it counts as being NBUS (Never Before Used Schtuff)!

I decided to stamp using Versa Mark and then heat emboss with silver embossing powder to try and match in with my patterned paper.

Once the stem, flower and bubbles were all heat embossed, I coloured the images using Faded Lilac, Picked Raspberry and Mowed Lawn Distress Inks.

I totally adore how the Faded Lilac and Picked Raspberry inks blended together on the flower... super pretty!  I did get some darks and lights too by simply drying the coloured image and then going back and adding more colour on top.  Very simple but also very effective!

Next, I adhered the coloured watercolour cardstock card front to the Kaisercraft patterned paper.  The photos don't clearly show the lovely pattern, or the varnish finish, of the paper.

Of course I had to add the 'birthday' die cut that I'd made earlier:

Since Krystal loves 'sparkly' things... and since I've had a bit of a thing for sequins and rhinestones lately I decided to add some to the card and here it is all finished:

I wish I could show you just how sparkly and pretty it all turned out but I'm really loving this card and hopefully Krystal will too.  She's at work right now but we're taking her out for dinner tonight to celebrate her day.

Thanks so much for stopping by xx

Thursday, 26 May 2016

Be awesome... Be yourself

Hi there :)  I've got some more cards to share today.  After I made my card yesterday I uploaded it to the Unity Stamp Facebook group and I had some lovely comments.  I also had someone ask 'how' I'd done the background so I thought I'd make some more cards and take all the necessary photos so here you go!

Today's cards are slightly different than the one I made yesterday... and I made the background using Distress Ink instead of Peerless watercolours but the process was largely the same.

I started off by die cutting four pieces of Distress watercolour paper using my Lawn Fawn stitched rectangle dies.  Once they were all ready, I took each one in turn and used Micropore tape to hold it flat on an old mini clipboard (I bought the Micropore tape at a local chemist for $2).

After trialing lots of different tapes I've found that the Micropore tape is the best for temporarily holding my watercolour paper onto the board... and it NEVER tears my paper!

Then I use a wide paint brush and applied clean water to the Distress watercolour paper... this helps the inks move around much more than if you apply them direct to dry paper.

Next comes the fun stuff... COLOUR!  I wanted to start with a blue background so I chose three Distress Inks: Blueprint Sketch, Salty Ocean and Peacock Feathers.  I just dabbed some of each colour onto a plastic place mat that I keep on my art table.

Then I used a soft, wet brush to pick up some of the colour and added it to my Distress watercolour paper.  I did some of each colour and let the colours flow into each other and react with the water.

Next I dried my paper with the heat gun... it's super fun to watch the colours change and mix as they dry.

I really love how you get darks, lights, and patterns over the background.  I wasn't finished yet though because I went back in with some more of each colour to create a bit more depth.  I also decided to add some splatter effects by just adding lots of water and a bit of colour to my paintbrush and then tapping it over my background.  It looked awesome when it dried!

When I was totally happy with my background I peeled off the Micropore tape and my background was ready.

Here's my blue background using Blueprint Sketch, Salty Ocean and Peacock Feathers Distress Inks:

I decided to make each card 'the same but different' so here's my orange background using Wild Honey, Carved Pumpkin and Rusty Hinge Distress Ink:

The pink background using Shaded Lilac, Picked Raspberry and Abandoned Coral Distress Ink:

And finally the green background using Cracked Pistachio, Mowed Lawn and Lucky Clover Distress Ink:

I love colour, so seeing my backgrounds all come together was pretty fun for me!  You can get very similar effects using Peerless watercolours, paints and lots of other mediums... the key thing I've found is that you MUST wet your paper BEFORE you start adding your colour so that it can move and blend right from the start.  Here's my completed backgrounds:

My next step was to start stamping... and I'm SOOOO pleased that I have a MISTI stamping tool because I had to stamp my 'Live Love Laugh girl' five times on each card to get the area perfect... I think it might have been because I was using watercolour paper and I wanted a really solid black for the image.  In the end I found my Tsukineko Archival Brilliance ink (Graphite Black) gave me the very best results... and my Simple Green stamp cleaning solution cleaned the stamp up perfectly when I was done!

I stamped the same girl on all four cards and then heat embossed her with clear embossing powder.  She looks quite funky against the coloured backgrounds too!

I wanted the finished cards to be a set but also be user friendly for a variety of different situations so I grabbed my Simon Says Stamp 'Be' set and got to work.  I stamped all the sentiments using Hero Arts Hero Hues Black ink... this ink is quickly becoming a favourite with me!

I used my MISTI stamping tool so I knew my stamp was going to be perfectly placed for all the cards... takes all the worry away that's for sure!

Next I stamped 'amazing' so that it read "be amazing"

And then I had another idea... or maybe that should be an 'expanded' idea because I came up with this:

Now the cards can be used for any occasion... and with a variety of colours to choose from it's even better!

Since these cards are designed to be a set I decided to back them with Bazzill's Beetle Black cardstock.  In spite of the name I actually find it to be a really soft black... more of a charcoal... which is exactly what I wanted for these cards.

Then I layered them onto some white cards from my stash:

I probably could have called them finished at this point... but I wanted to add a little bling in the form of sequins!  These are Simon Says Stamp Moonshine sequins which come in a pack of 3mm, 6mm and 10mm sequins all in one pack.

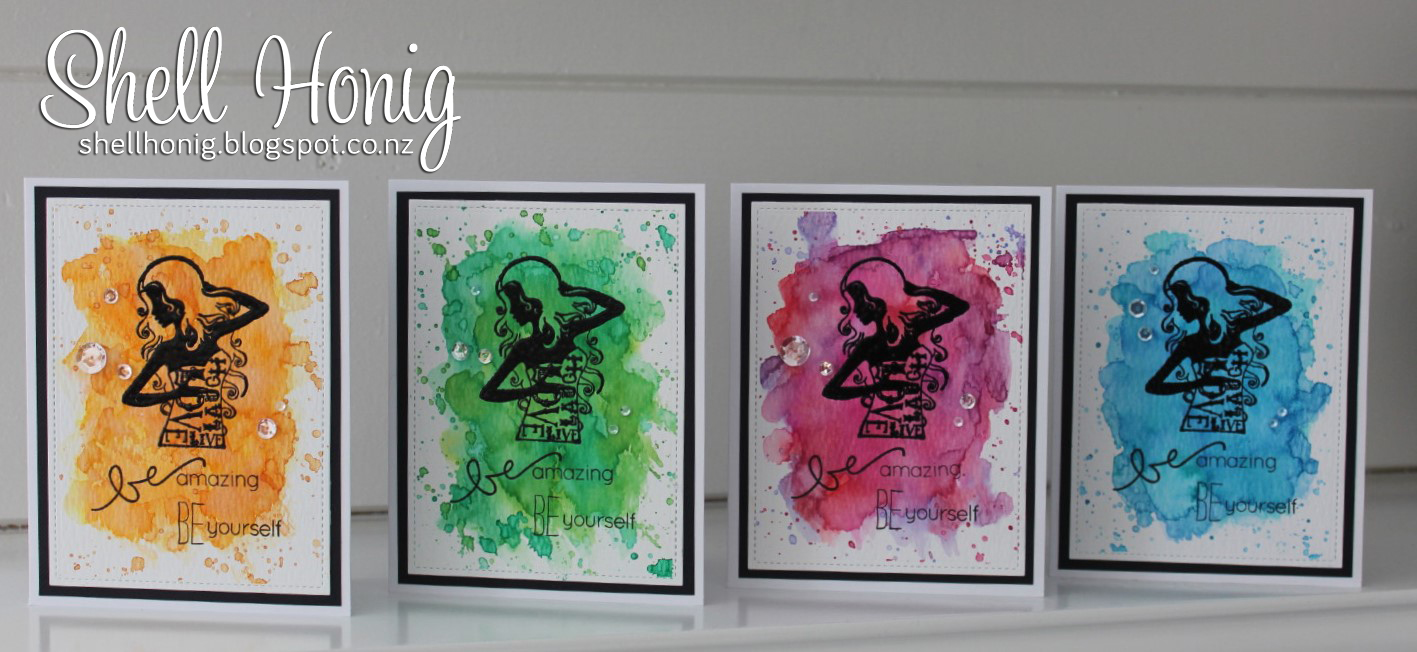
Here are my finished cards:


And here they are all together... loving the colours!

Thanks so much for visiting my blog today xx