Showing posts with label Grandbaby. Show all posts

Wednesday, 11 October 2017

Chloe had a party :)

Hi there :)  On Saturday we had a special little celebration... a surprise baby shower for Mikayla and Chloe.  Krystal had been wanting to do a baby shower for Mikayla but with her living in Invercargill it just wasn't 'do-able' so we decided to throw her a surprise baby shower while they were here on holiday... they're here for a few more days so Nana is very happy :)   There were loads of photos but I've managed to cull it down to just 26 of my favourites.

Here's the wee party girl

I had my first go at making a banner and totally loved how it turned out so I did some bunting complete with baby photos to go along the wall.

Then we had another little area dedicated to our photo booth... so much fun!  We also had a 'Guess how many babies in the bottle' competition.

Next we had the present and party favour table.  The beautiful leather hatbox was from Luna Creative (more on that in a moment) and the gorgeous mantle clock was given to my grandparents when my dad was only a little boy.  So special to have this in my own home.

Instead of everyone bringing your traditional baby gifts we asked everyone to donate a book to Chloe's bookshelf and it turned out to be a great idea!  Chloe now has lots of new books that Mikayla will be able to read to her as she grows up.

Krystal had ordered favour boxes but they didn't arrive in time so the night before the party Michael and I were up making these little boxes.  Actually we had quite a lot of fun making them and they were much more personal.  Each favour box contained some individually packaged tea bags (since the party was a high tea) along with a gorgeous felt and lavender bookmark created by Krystal and three heart chocolates.

These next favours were just a fun little add on... baby rattles to hold a Chubba lollipop.

Ok... remember I mentioned Luna Creative regarding the hat box?  Well Sarah from Luna Creative has all sorts of vintagy goodness that she hires out for weddings, engagements, parties and of course high teas.  We hired all sorts of goodies from her including vintage tea cups, plates, cake stands, bird cage, pretty flowers and a drinks dispenser.  We also hired a small chalk board (which Sarah wrote on for us... she does gorgeous chalk work) as well as a huge frame for our photo booth and of course the hat box.
https://www.facebook.com/lunacreativenz/

We were super impressed with her service and totally support local people doing a fab job!  Click the logo to visit her Facebook page.

Now you'll get to see all the lovely vintage cups, plates and cake stands :)


Hummus and crackers


Time for some more decorations... this was the gorgeous bird cage we hired and we filled it with flowers, jewels and LED tea light candles... so pretty!  There were also a few more photos of Miss Chloe propped up on the birdcage.

Here's Sarah's beautiful chalk work.

Every little girl needs a tiara :) 

A quick photo with Aunty Krystal and Nana

Chloe wasn't interested in how many jelly babies were in the bottle LOL

Much more alert for Aunty Krystal... and ready to play the Baby Bingo game Aunty organised.

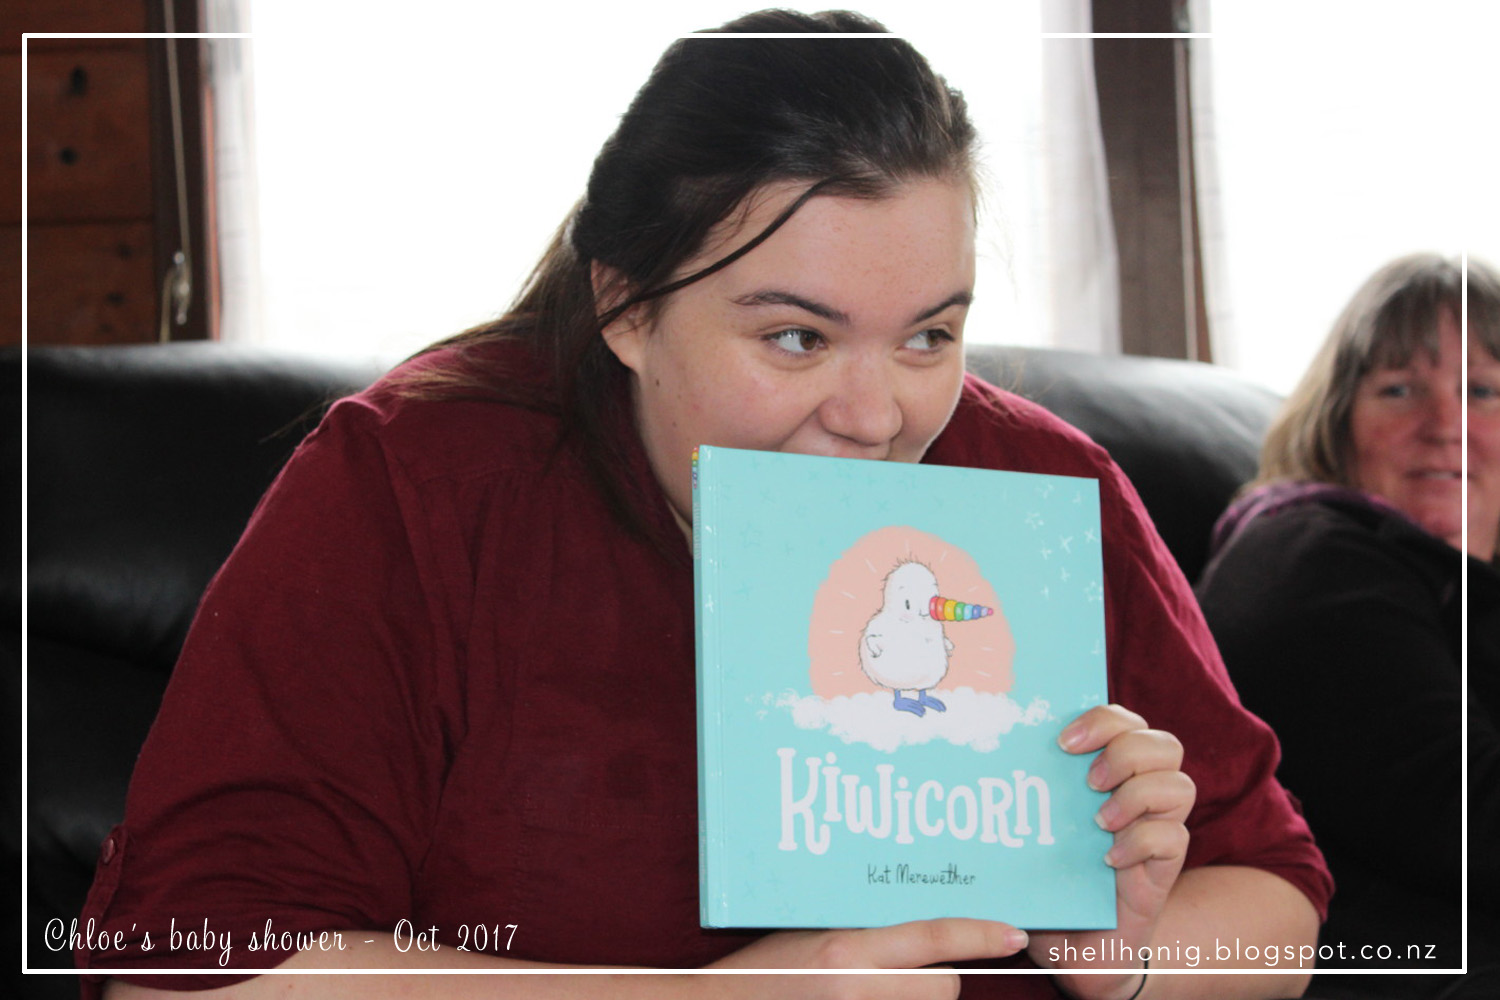
Mummy (Mikayla) showing Chloe some of her new books.

Kiwicorn is a seriously good book with a beautiful message... if you have children or grandchildren I highly recommend it.  Good choosing Aunty Krystal!
Aunty Krystal made the cake complete with 'naked' icing and fresh roses... and I have to say it not only looked beautiful it was also delicious!

This is actually one of my favourite photos from the party... apart from the 'Chloe photos' of course!

And by the end of the party one little girl just needed to close her eyes. Such a lovely photo of my two 'babies'.

To all our family and friends who came to meet Chloe on Saturday... thank you so much for joining us.  Krystal and I really appreciated your company and support.
Thanks so much for visiting my little corner of the world and sharing in our celebration xx

Sunday, 8 October 2017

The Daily Marker 30 Day Challenge - and some more Chloe

Hi there :)  Today I've got the final 10 days of colouring from The Daily Marker 30 Day Challenge.  I totally enjoyed this challenge and I know I'll do it again!

Day 21 

 This one is a card that I made for one of my friends who organised the scrap retreat and features a chef from my colouring on Day 15.

Day 22

I used one of those unicorns from Gerda Steiner designs to make Michael a birthday card.  He totally loves unicorns so it was an easy choice to buy this stamp and die set.

Day 23

I stamped and cut a few hedgehogs on watercolour paper.  They are from MFT's Happy Hedgehog stamp and die set.

Day 24

Lots of brown colouring today using Distress Inks.  I love the richness of colours you get when you layer the inks.

Day 25

Time to break out the colour!  I added some red, orange, greens and blue to the little hedgehogs... thank goodness for having Google on my phone when I was looking for the acorn colouring!

Day 26

Time to make a background for my hedgehog card.  I blended Distress Inks onto Bristol Smooth cardstock... love how easy the ink blends together!  

While I had my inks out I inked and blended another piece of Bristol Smooth cardstock so that I could cut some Autumn/Fall leaves.

Day 27

I inked up some more Bristol Smooth cardstock using Distress Oxide Ink - mostly using browns - to make the frame for my card.  I used Lawn Fawn's Leafy Tree Backdrop for this card.  As you can see I also added some water spritzing to my background from Day 26.

Day 28

Yay a finished card!  I added a couple of hedgehogs (which I backed with foam for extra dimension) along with some Autumn/Fall leaves.  This card was for a friend of mine who has been unwell (read that as 'sick as a dog!') she also loves hedgehogs so I was pretty sure she was going to like this one.

Just lately I've been decorating the inside of my cards as well and I haven't really shown them but I'll share this one with you as I'm super pleased with how it turned out:

Day 29

Since I had all the things out for my previous hedgehog card I thought I'd make one more.  This one was scraplifted from Tricia Barber:

Day 30

For the last day of the challenge I really didn't know what I wanted to make/colour so I stamped some polar bears, heat embossed and then die cut them... and to be honest they're sitting in a little container waiting to be coloured because I had some other projects that needed my attention.

And now for some Chloe time... being a Nana is awesome!!  I love this little girl so much already.  Mikayla and Chloe flew into Rotorua last Monday and the snuggles and cuddles commenced immediately!  Auntie Krystal came with me to the airport and it's been an awesome week of family time since then.  Here's a few little snippets from this week:
Shopping in Farmers with Nana.  She slept like this for about half an hour and it's was lovely :)

Uncle Toby has totally fallen under Chloe's spell.  He absolutely adores her! 

 Chloe was having some tummy time so Uncle Toby joined in :)

Miss Chloe was helping me in the kitchen... and sporting a new little onesie that Nana bought for her!

Thanks for visiting today... time for some more Chloe cuddles now xx

Saturday, 26 August 2017

Space card... tutorial ... and a Chloe update

Hi there :)

Today I've got a card to share with you that I was commissioned to make.  It's for a little boy who is turning 3 tomorrow.  Let's start with the finished card which features a cool galaxy background, stamped images from Gerda Steiner Designs (Blast Off) and a shaker element... I'm super happy with how this all turned out!

I took lots of photos while I was making this card and I don't know if anyone else uses my little tutorials but I actually go back to look at them quite often to get ideas or remind myself how I did something.

Last time I made a galaxy background I used Distress Inks... you can check that one out HERE.  This time I'd seen a YouTube tutorial by Amy R using Gansai Tambi paints which I just happen to have in my stash so I thought I'd give it a go... and I LOVE how it turned out!!!

To be fair, the background doesn't look good until you get right to the end... but Amy warned me about that in the video tutorial and said to just keep going with it and I followed her advice... thanks Amy!

I've got my new computer (27 inch touch screen!!) set up on my crafting table and I couldn't be happier!  Watercolour paper taped down... paints ready...  video ready... Here we go....

Kinda liking where this is heading... the colours look really pretty.

Added in some more colour... oh crap!  Not liking it anymore!

"Keep going" said Amy... black added... oh my gosh... nope not liking it at all!

Hmm.. ok... it's looking kinda cool now...

Little flicks of pearlised paint for the stars... yep I'm definitely liking this now...

All dry and tape removed... oh yeah baby!  Wow... wow... wow... LOVING this!

Time to cut the background up... I started off with a 8 1/2 x 11 inch piece of watercolour paper and I got FOUR stitched rectangle backgrounds out of it... loving that too!

I had a bit of a vision in my head of what I wanted the finished card to look like so I die cut the hole for the shaker piece to fit into... die cut a stitched piece for the 'planet' and cut another piece of watercolour paper for the back of the shaker window.

Next I got out my Distress Inks and added some Pumice Stone and Hickory Smoke to create a moon and shading on the planet.


Time to make the shaker element... I used small star confetti from Pretty Pink Posh (6mm and 2mm) along with some clear Micro Beads... super fun!

I glued the shaker pouch to the watercoloured 'moon' background... let it dry... and then glued the shaker pouch to the underside of the card front.  I used Multi Medium Matte which took hardly any time to dry and it bonds really well.

Add the 'planet' along the bottom... still loving that background!

Then I die cut the Happy Birthday Circle Frame from glitter cardstock... I even remembered to add some Stick It to the back of my cardstock before I die cut it which made sticking the frame down super, super simple!

Then it was time to add my stamped and coloured image.  I decided to pop him up with some foam and it worked perfectly!  I've had lots of problems with the foam I've been able to get in New Zealand so I took a chance and bought some SugarPea Designs 'Sugar Puff' foam and it's FANTASTIC!  I stuck the image to the foam using some more Multi Medium Matte and it worked perfectly.

I popped the card front onto some blue cardstock and added the little spaceman using some more Multi Medium Matte.

On the inside of the card I added another little image from Gerda Steiner's Blast Off set and the sentiment is from Gerda Steiner Alien Invasion.

Here's another look at the finished card:

And of course I've already got three more galaxy backgrounds ready to go to make more space themed cards :)

Now for little Miss Chloe... or as my daughter has taken to calling her... Chubba Chub!  She now weighs in at just over 9lb 8oz and she is one month old!  Mikayla is loving motherhood and she is doing such a great job... super proud of my girl!  I will get to meet Chloe in the next school holidays (just over 5 weeks away) but in the meantime Mikayla sends me regular photos and video clips of what Chloe is up to... and we also Skype.

Check out this gorgeous wee face... she looks so surprised to see the camera LOL

How's this for beautiful:

Chloe is getting really good at holding her head up and trying to push with her feet too... I think she's going to be a crawler before we know it!  Here's a little video clip of my beautiful Grandbaby:


Thanks for dropping by today... wishing you all a wonderful weekend xx