Showing posts with label Zara. Show all posts

Saturday, 1 February 2025

Week 4 15:3:1

 Hi there

When I first embarked on the 15:3:1 project this year I said that the '3' was for 3 hours on a Saturday morning doing something creative for myself. 

I also said: I didn't want to 'lock' myself into sewing and quilting so I'm leaving it open as 'something creative' that way I CAN do sewing or quilting but I could also do cardmaking... or photography.... or trying out icing nozzles making cupcakes... or my lastest thing... 3D printing!

Week 4's update might be pushing the 'something creative for myself' lines a bit but it WILL lead me to being able to get some more creative time in the future so I'm counting it as a win!

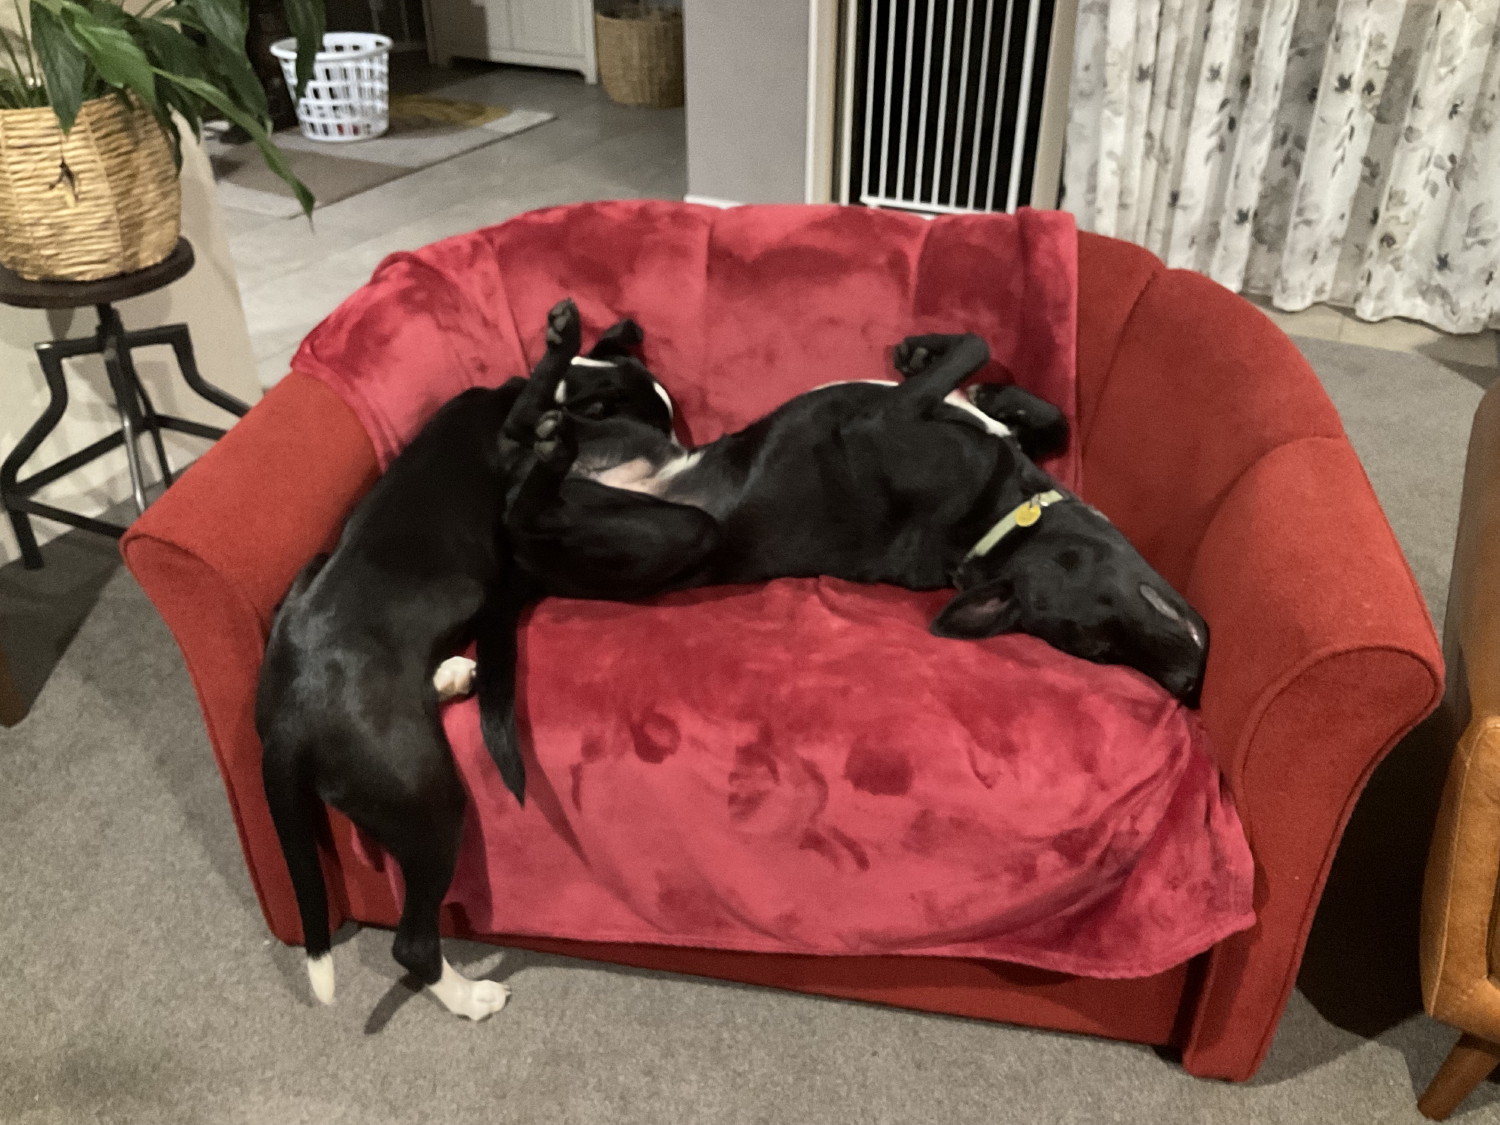
As you know, I have two wee fur babies now... Mr Alfie celebrated his first birthday just before Christmas... and Miss Zara is currently 5 1/2 months old.  They are the best of friends... they play together... they snuggle together... (ps the red sofa is just for them... bargain on Marketplace!)

Such awkward poses

Let me on the sofa Alfie

Zara always seems to get her way with him!


Just as well they're good mates

AND they join forces as weapons of mass destruction!!

This was definitely a joint effort!

What do you mean, we can't come inside???


It turns out that BOTH of my fur babies think digging is a great thing!  They have been digging holes and tunnels in their kennel for quite some time now!

Broom to show size reference

Broom inside the hole!

I was gobsmacked at how big.. deep... and wide the hole had become.  Alfie could completely fit into the hole and not be seen from the house.  I was also concerned that the hole might cave in with one of them inside it... so a plan was hatched to solve the problem.

The first bit was easy... fill in all the holes and even out the dirt:

Turned out that with some help the next bit wasn't too difficult either.  First I removed one section of the canvas roof and we took the dog houses out... and while they were out I gave them a really good clean!  

Then Auntie Jenn and Uncle Scott came to the rescue with electric saws and a very sturdy nail gun as well as a ute to collect the required materials and we got stuck into it!

Move the furniture and set up under cover in case it rains  

Cut all the wood to length

Nail the boards to the joists
And repeat... and repeat... and repeat...
Hmmm this is different

Soooo happy with how it turned out

This is 'acceptable' Mumma

I think their favourite part of the day was all the snuggling and cuddles with Auntie Jenn!

The awkward sleeping poses haven't stopped... Zara was actually asleep in this position for nearly half an hour the other night!

That can't be comfortable!

So have I solved all the puppy digging and going into out of bound areas yet... ahhhh NOPE!

Hurry up Alfie... before Mumma comes!

I'm still hoping they will just grow out of it... but I think I might be waiting quite a while!

Thursday, 23 January 2025

Sometimes creativity can be frustrating!

aka Week 3 update of 15:3:1

On Saturday I decided that my 3 hour creative outlet would be making sprinkles to use on my cupcakes and cookies.  I'd seen the idea on various Tik Tok and YouTube tutorials and it looked pretty 'easy'.

I decided to 3D print my own sprinkle templates and thought I'd start off with a bunny... thinking ahead to Easter of course... you can never be too well planned (I think I heard that somewhere random).

First things first.. print a template - CHECK

3D print sprinkle stencil


#2 Make some royal icing - CHECK

#3 Spread royal icing over the sprinkle stencil - CHECK

Mint green bunnies for Easter sprinkles

#4 Lift sprinkle stencil off and reveal beautiful bunny sprinkles... ahhh NOPE!

Those don't look like bunnies!

Try again... thicken up the royal icing a bit and give it another go - CHECK

Thicker royal icing

Lift sprinkle stencil off and reveal beautiful bunny sprinkles... ahhh NOPE... again!

Better... but still not very bunny like

Damn... blast... and bother!!!

I decided that maybe my stencil was the issue... so I bought a 3D print file from someone else who had demonstrated their work.

Back to the 3D printer - four leaf clovers this time!

 Try to get the royal icing consistency exactly like what it looked like in the tutorial - CHECK

Not what I'd call a success!

So after all that I was feeling quite defeated with sprinkle making. To be honest, I don't think Royal Icing and I are ever going to be friends!  I've tried it several times before and never felt like it was my thing... and I think I'll stick to that for the time being.

By this stage I needed to make 'something' so that I felt like I'd had some crafting time.  So out came the fondant... fondant and I are definitely friends... and some pretty Easter colours... and some fondant moulds.... and this happened:

Lemon, Lavender and Blue Bell


Not sprinkles... but it worked!

A couple more Easter colours

A few more flowers

And then I had an idea... what if I made a bunny CUTTER.... a small bunny cutter.... maybe a multi bunny cutter?  I went back to my designing programme... and back to the 3D printer... and gave it a go.

I came up with a little cutter that did six bunnies at a time... each one about the right size for a cupcake sprinkle.

I rolled out some of my pretty fondant and gave it a go.

That doesn't look too bad

Holy cow!!  That worked perfectly... and before I knew it I had lots and lots of bunnies!  In fact I had 106 bunnies within just a couple of minutes!

Bunny sprinkles!

Hmm... so thinking about Easter... what if I did some carrot sprinkles as well?  I went back to my design programme... made another 3D printed cutter... and success!!

Carrot and bunny sprinkles

Ever heard the saying... quit while you're ahead?

I wish I'd decided to do that... but instead I thought... I'll just quickly get changed before I took my fur babies for a walk in the forest... 

... and Zara thought... I'll just help myself to some of Mumma's bunnies while she's not looking!

Zara LOVES fondant!

I'd not only forgotten that Zara LOVES fondant... but that Zara has grown quite a bit and can now reach her paws... and clearly also her tongue... a lot further than I had realised!

I went from having 106 bunnies to having less than 50!

Did Zara look guilty when I came back from getting changed??? 

NO she did not! 

I did tell her that she might not need dinner that night because she was 'full of bunnies'... to which she just looked at me and went off to play!

Regardless, I've worked out how to make my own sprinkles so you will probably see more of them in future posts :)

Thanks for stopping by!

Saturday, 18 January 2025

15:3:1 I got there in the end!

This has turned into a double meaning... I originally meant that I 'got there in the end' with my creative project... but now it's taken me a bit longer to blog about it as well.

My creative '3 hours' last week turned out brilliantly in the end and I've very, VERY happy with it! While it did take me longer than 3 hours to do the time just flowed and those are the best kinds of projects.

This one has been hanging around in the back of my brain for a while and I had several ideas for it but love what I've come up with... so without further ado... here is my Gallery Wall:


So let's back up a bit... I've long admired gallery walls and after doing a bit of research I discovered that there are two main styles:

Grid Style


Salon Style

And then there is a whole heap of other combination such as the 'Staggered Grid'

All of these examples came from Chelsea Freng's blog (which I discovered today)

Meanwhile I had found a great tutorial that had all the info I needed HERE

Of course my first decision was... what am I going to put in my frames?  I actually bought the frames about 6 months ago... and I've changed my mind about what I was going to put in them at least a dozen times!

Just as I was deciding what I wanted, I came across an Instagram post about how to get cute photos of your dogs... so I thought I'd give it a go.  MANY treats later (and possibly a few naughty words) I did in fact have some photos I was happy with. 

I chose one each of Alfie and Zara face on... and one each of them side on. Then I uploaded them into Canva and played around with a few filters before selecting X-Pro+

So that took care of four of the frames... and for the others I purchased some Snoopy quotes that I liked.

I had purchased nine frames thinking that I was going to do a 3 x 3 landscape grid... but then my photos and quotes were all portrait oriented so I had to find out if that was going to work.

I'd purchased a laser level after borrowing one for another project and it was super handy for this project... especially when I realised that it would fit on my camera tripod... happy accident!

I cut out the frame sizes from brown paper and used painters tape to put them on the wall to see if I liked the layout... ummm NO

Back to the drawing board... I decided on a 2 x 4 grid and taped that to the wall.. MUCH better.


Then I marked my corners carefully (thankfully) and decided to wait until the next day to make sure I really liked it.  I was so pleased I'd marked those corners because the next morning I discovered most of my papers were on the floor!  At least I knew the tape hadn't damaged the wall paper.

The next step was placing the Command hooks... I was VERY careful to follow the tutorial AND the instructions on the packet.

  • Wipe walls with isopropyl alcohol - CHECK
  • Stick the strips together until they click - CHECK
  • Remove one side of the liners and stick to the frame - CHECK
  • Take off the remaining liners and press firmly onto the wall - CHECK
  • Remove the frame and press each strip on the wall and the frames for 30 seconds - CHECK
  • Wait 1 HOUR for the adhesive to build - CHECK
  • Press frames back into place until the strips click - CHECK

So at this point I thought - that looks pretty good... great job Shelley!

And then I saw the frames side on and noticed that because I'd used white Command strips they were super noticeable.

I tried to leave them... but my 'perfectionist' genes just wouldn't allow it. As it turned out, even though I thought I'd read ALL the instructions... there was one important one that I'd missed completely... DO NOT HANG ON WALLPAPER!

It turns out that they pretty much just peeled off super easy with no damage to the wallpaper at all.  Hmmm that wasn't what I was hoping for. In fact, they came off so easily that one of the frames fell off the wall before I realised what was happening and the frame broke... lucky I still had one spare thanks to changing my grid!

So... I had another think... the purpose of the Command strips for this project was to get the frames lined up perfectly... and since I own the house and don't have to worry about what a landlord would say there was a super easy solution... staple gun!

Back to the shop I went and purchased some black Command strips... and this time I cut them in half lengthwise so that I could have them on both the top and bottom of each frame.


It turns out that the Command strips didn't really like my frames either... so a little bit of super glue helped that little situation.  I did the placements on the wall again and then staple gunned each strip in the centre... utter determination to make it work!!


 I had the frames all ready to go:

In the end the frames went up absolutely perfectly... and the view from side on with the black Command strips is so much more pleasing to the eye.


The only thing left to do was to re-hang my bee print (which I bought in Cambridge in 2023)

Here's a glimpse of what the eight frames contain:

It's safe to say that I LOVE how the gallery wall turned out!