Showing posts with label Distress Markers. Show all posts

Tuesday, 10 January 2017

Finally... a card making tutorial!

Hi there :)  It's been AGES since I've shared a card making tutorial and for some reason I've got the urge to share today.  I actually made this card back in November and although I had the very best of intentions giving it away I just couldn't bring myself to do it so it's still sitting on my craft table... but it DOES make me smile :)

Before I start I want to say that all the links for the products will take you to the Simon Says Stamp  website because that's where I get a lot of my supplies.  It's getting harder and harder to buy anything I want in New Zealand now which is such a shame but I do buy local when I can.

The inspiration for this card came from something I'd seen on the internet by Laura Bassen... super loved her card so I had to give it a go myself.

For this card I used Simon Says Stamp Warm Christmas Wishes stamp set and the Warm Wishes Die set.


I've been playing around with my stamps and dies to see which way I prefer to do it... die cut and then stamp or stamp and then die cut.  I've found that what works best for me is to stamp and then die... it just seems to work better (and quicker) for me... especially if I'm also heat embossing the images (which I tend to do most of the time).

I started off stamping all my images onto Tim Holtz Watercolour cardstock with black Hero Arts Dye Ink and then heat embossing all the images with Ranger Clear embossing powder.  

Next I got out my Zig Clean Color Real Brush Markers... I LOVE these markers!  I've quickly become a HUGE fan of them.  They're so easy to use... love the range of colours... and totally love the way they blend with water and each other to create a super smooth look.  Plus they're really VIBRANT!  I feel like I get the look of Copics with the ease of watercolour... and that works for me!

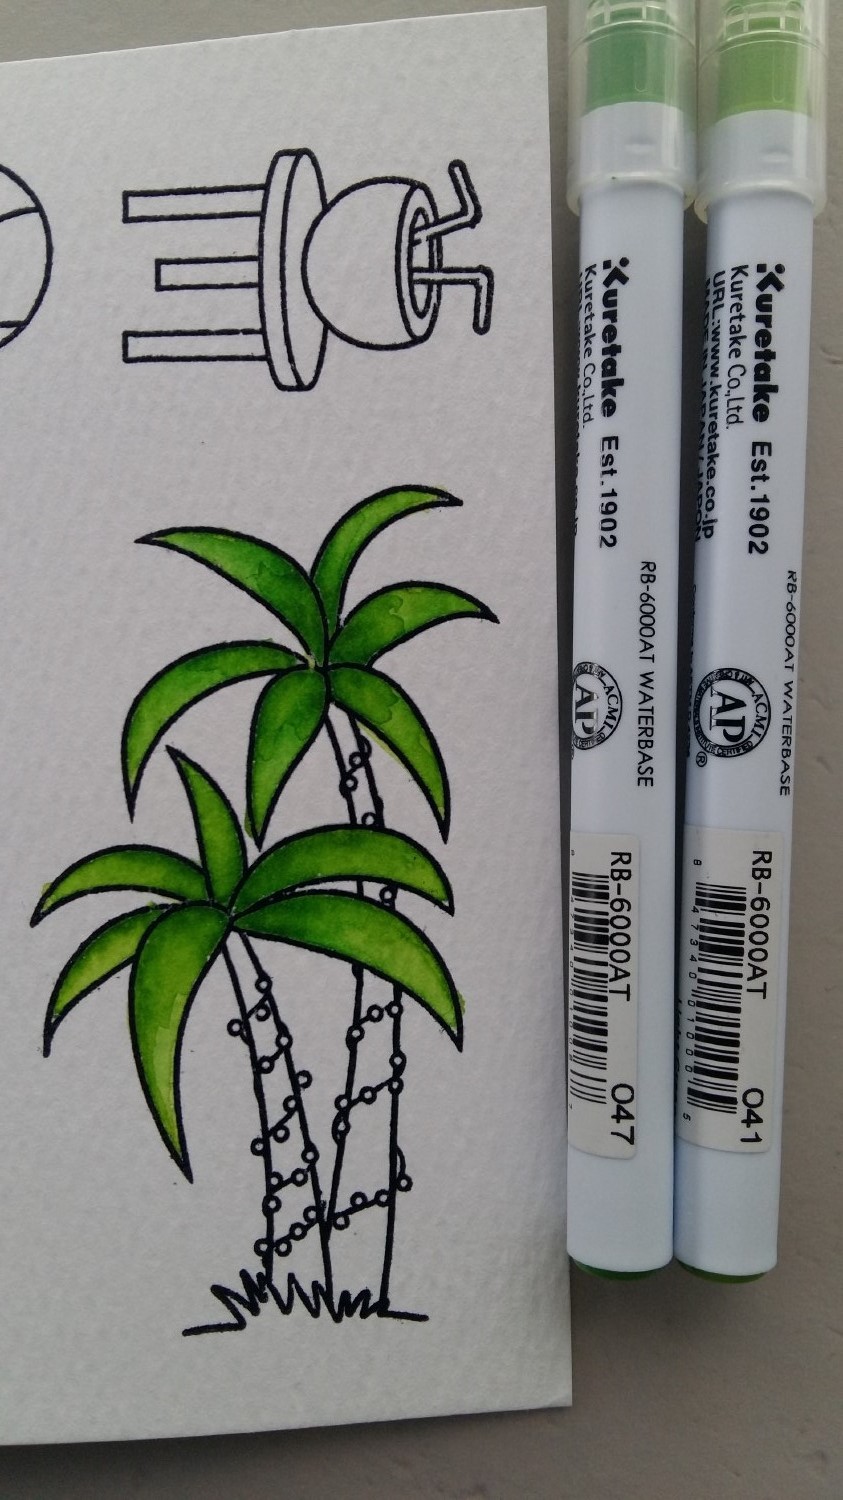
I started off colouring the palm leaves with 041 Light Green & 047 May Green. I also did some of the surf board and beach ball with these colours.
Next I used 032 Persian Blue & 050 Yellow to add some colour to the surf board, beach ball and Santa's boxer shorts.

Since I was on a roll with my colours I decided to add a real rainbow effect to the rest of the beach ball and surf board with 070 Orange, 027 Dark Pink, 024 Wine Red & 080 Violet.

Next came the trunks of the palm trees with 060 Brown & 068 Deep Brown.

While I was working with the browns I did the table in 068 Deep Brown & 062 Dark Brown.

I was starting to get the hang of the colouring techniques by now so I started on Santa's face with 071 Flesh Color. 

For Santa's hat I used 260 Deep Red & 024 Wine Red. 

For the rest of Santa's boxer shorts I used 042 Turquoise Green & 033 Persian Green.

I wanted to leave Santa's singlet pristine white so I decided to add a little bit of colour to his beard using 097 Pale Gray. 

And since it was Christmas I HAD to add a little bit of glitter to Santa's hat with my Wink of Stella pen. 

After all that I decided that Santa really needed some sun classes to protect his eyes from the UV rays so I stamped and embossed some glasses on a scrap of  watercolor paper and then I used 031 Cobalt Blue and 036 Light Blue to colour his lenses and some 090 Gray to colour the frames.

Then it was time to start assembling the card.  I cut a piece of 'sand' from watercolor paper using Mama Elephant Borderlines Trio dies.  I added a base of colour using Antique Linen Distress Ink.

To help me create the 'sand' effect I used Antique Linen, Old Paper and Scattered Straw Distress Markers along with my Spritzer Tool.  I really love how the 'sand' turned out!

To create the horizon and sky I used Cracked Pistachio & Peacock Feathers Distress ink and blended them together creating a more intense blend along the horizon line.

Then it was time to put my two background pieces back together again.

A few months ago I saw the Mama Elephant Jingle Greetings stamp set and I knew I HAD to buy it so I used one of the sentiments along with some Ranger Liquid Platinum embossing powder.  I really love how the sentiment turned out!

Then came the fun of assembling all my coloured images on the card.  I got so caught up in what I was doing that I didn't take any photos but I can tell you that some things are flat on the card and some have been adhered with foam tape.

And here's my final card (click on the photo to get a closer view):

I'm still really happy with how it turned out... maybe I'll be ready to part with it for Christmas 2017!

Miss Krystal (24) said to me yesterday that I need to think about doing video tutorials... apparently that's 'where it's at' now.  What do you think... photo or video tutorial?  I'm not sure if my kiwi accent is ready for the internet LOL

Thanks so much for visiting xx

Saturday, 11 June 2016

A Gnome on the roam!

Hi there :)  Last weekend I woke up with a 'roaming gnome' on my mind.  While I was tidying up some of my supplies I stumbled upon a NBUS (Never Before Used Schtuff) stamp set... Tim Holtz' Cityscapes.  I vaguely remember purchasing this stamp set but clearly whatever idea I'd had when I bought it had slipped from my mind!  I decided to have a go at something a little different so here's how it went.

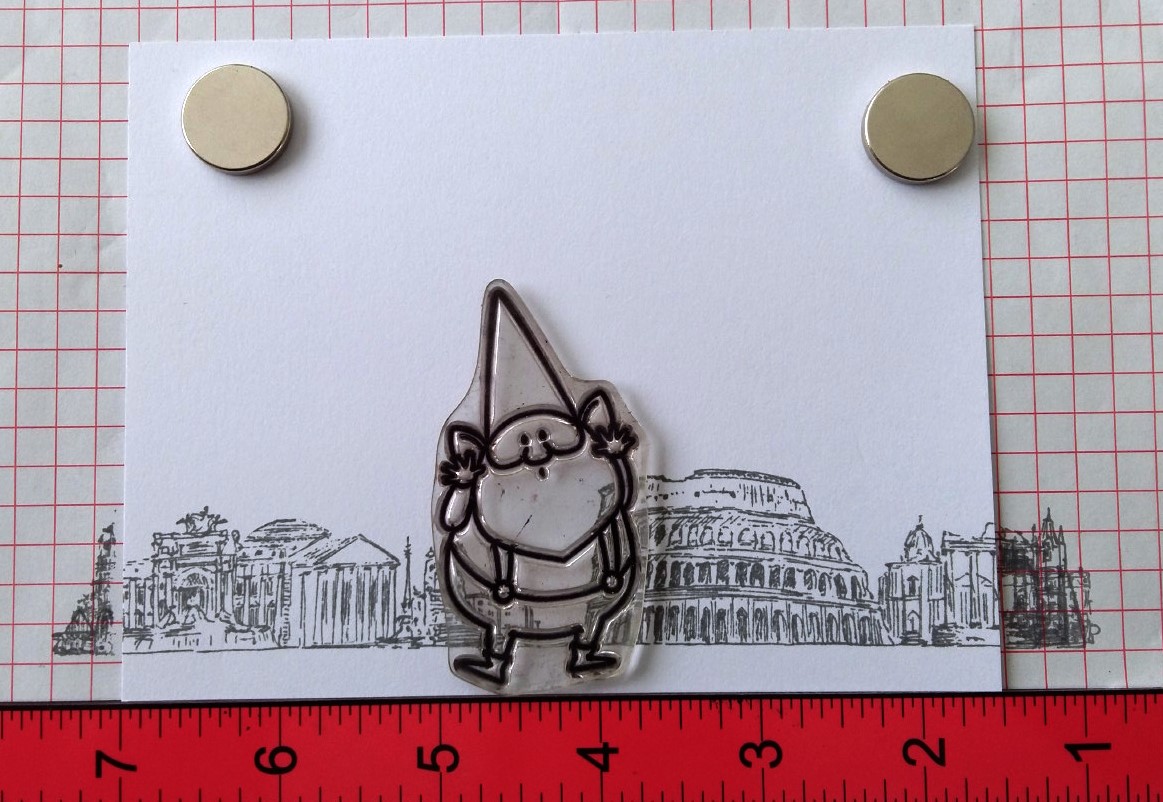
I started off by stamping each of the cityscapes onto some plain white card using Rangers Cool Graphite ink so that it had a 'soft' feel to it.

Next I grabbed one of my gnome stamps from My Favorite Things You Gnome Me.  I like the little guy with 'jazz hands' because he looks like he's waving.  Since I wanted the cards to be a set I placed my gnome in the MISTI and then I moved the backgrounds left and right until the gnome was in the right place for each individual cityscape.

I stamped the gnomes onto some watercolour paper since I wanted to do quite a few techniques on the cards.  It actually didn't take long to get them all stamped and heat embossed.  You can see the individual cityscapes sitting underneath the gnomes so that I knew which backgrounds were going onto each gnome.

Next I got out my masking fluid and carefully painted over all of the gnomes.  It's surprisingly easy and it worked even easier with the embossed images.

I left the gnomes to air dry... it's super easy to tell when the masking fluid is dry because it changes to a more yellow colour.

Next it was back to the MISTI.  I put each individual background back into the MISTI and lined it up with my previous stamped image.

Then I placed each stamped and masked gnome into the MISTI to give them their backgrounds which I stamped with the Ranger Cool Graphite ink.

Using the plain card images certainly made the stamping process much easier and I was thrilled when each card front turned out perfectly!

Now for some colour!  I did a bit of a wash over the background images with Pumice Stone and Weathered Wood Distress Inks.

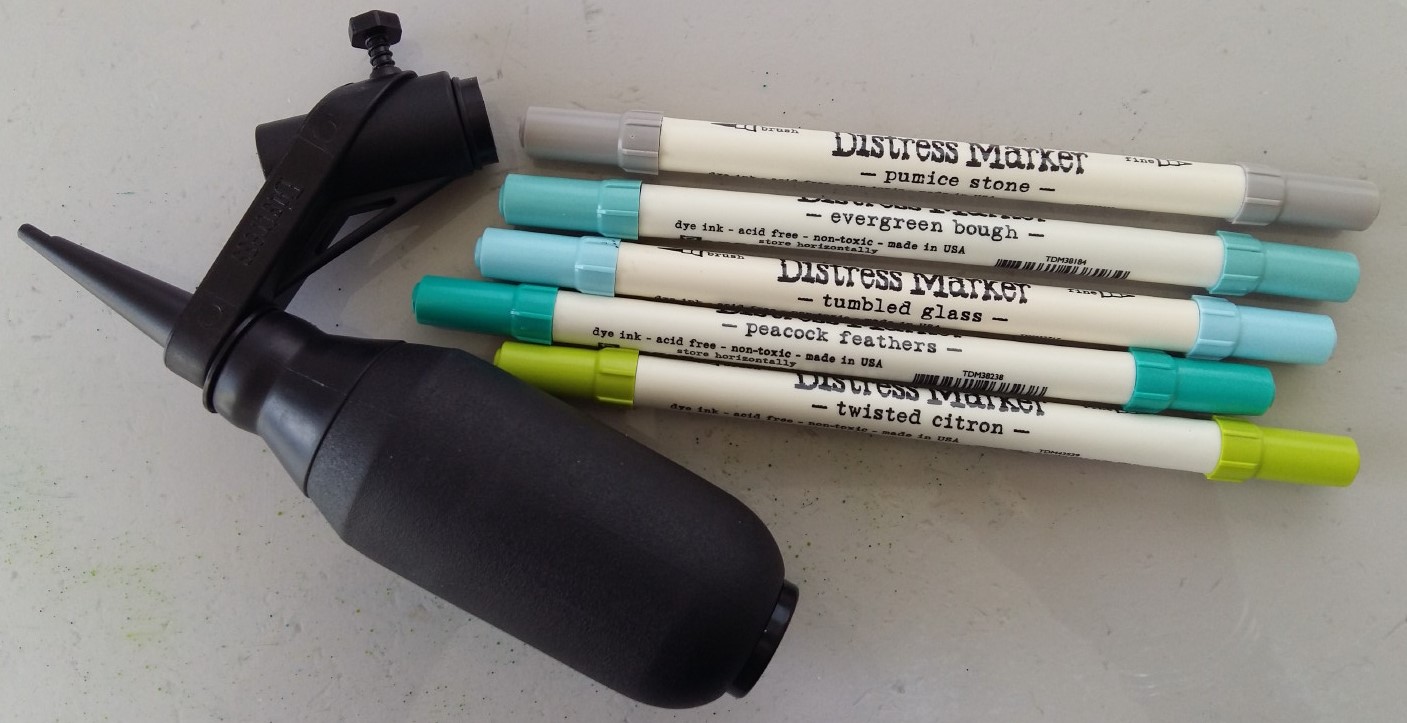
Then for something completely different I opened my brand new Distress Ink spritzer tool.  I was actually super lucky when I went to purchase mine because it scanned up at HALF the price on the ticket!  Yay!!!  I chose quite a few colours to give a light mist with: Pumice Stone, Evergreen Bough, Tumbled Glass, Peacock Feathers and Twisted Citron Distress Markers.

I was thrilled with the effects... and super pleased that I practiced on a bit of scrap paper first too!!  I didn't want to colour in the cityscapes... I just wanted to give a bit of colour to the overall background.

Once I was happy with the background I gave it a quick blast with the heat gun and then it was time to unmask the gnomes.  I had a bit of a 'learning curve' with this... I did my first gnome:

BLAST... bugger... damn... ink where I DIDN'T want it!  You can see it on his cute little gnome face and on his pants.

I couldn't figure out WHY I was getting ink on my card... especially since I'd dried it with the heat gun... and then I figured it out... the ink was sitting on top of the masking fluid!!  DUH!!!

I grabbed a paper towel and dried all the ink off the next gnome:

Then I removed the masking fluid and VOILA... no ink where it shouldn't be!!

Not to panic about the first wee gnome... I just painted over the ink that was on the gnome with my water brush and then used some paper towel to 'lift' the colour and it worked perfectly.

Here's my unmasked gnomes all ready for their colour to be added:

By the time I'd done all of these card fronts it was getting a bit cold in my art studio... there is a definite drop in temperature around 3.30pm!  I took my wee gnomes upstairs along with my Peerless watercolours and added some Flesh Tint to all their faces, hands and ears.

That brought my Queen's Birthday weekend to a close and my poor wee gnomes sat on the table for the entire week waiting to get their clothes!  I'm happy to report they are now fully dressed but I'll show you that in my next blog post.

Thanks for visiting xx
     

Tuesday, 26 April 2016

Something different... but still some gnomes!

Hi there :)

I recently discovered a You Tube tutorial by Jennifer McGuire about partial die cutting.  What instantly caught my attention was her use of the little gnomes I've been using.  I really wanted to give it a go so I watched the video several times.  If you want to see it for yourself you can check it out here:

Jennifer explains everything REALLY well so I gathered my supplies and got started.
  • Attempt 1 = epic fail!
  • Attempt 2 = epic fail!
So I went back to the video again and really paid attention and my third attempt was MUCH better although the die still cut further in, than I was happy with.  I did however take my attempt, coloured it with Distress Markers and turned it into a card that I'm pretty pleased with.


Then I put the card aside while I was doing a few card challenges... and then yesterday afternoon I decided to give it another go so it was back to the video and I realised exactly what I needed to do.

I die cut and stamped another gnome and it turned out perfectly!  This time I coloured him using Peerless watercolours and I love how he turned out!


And here's my cards side by side.  I really love the vibrancy of the Peerless watercolours!


Thanks so much for visiting my blog xx