This has turned into a double meaning... I originally meant that I 'got there in the end' with my creative project... but now it's taken me a bit longer to blog about it as well.
My creative '3 hours' last week turned out brilliantly in the end and I've very, VERY happy with it! While it did take me longer than 3 hours to do the time just flowed and those are the best kinds of projects.
This one has been hanging around in the back of my brain for a while and I had several ideas for it but love what I've come up with... so without further ado... here is my Gallery Wall:
So let's back up a bit... I've long admired gallery walls and after doing a bit of research I discovered that there are two main styles:
 | ||
| Grid Style |
 |
| Salon Style |
And then there is a whole heap of other combination such as the 'Staggered Grid'
All of these examples came from Chelsea Freng's blog (which I discovered today)Meanwhile I had found a great tutorial that had all the info I needed HERE
Of course my first decision was... what am I going to put in my frames? I actually bought the frames about 6 months ago... and I've changed my mind about what I was going to put in them at least a dozen times!
Just as I was deciding what I wanted, I came across an Instagram post about how to get cute photos of your dogs... so I thought I'd give it a go. MANY treats later (and possibly a few naughty words) I did in fact have some photos I was happy with.
I chose one each of Alfie and Zara face on... and one each of them side on. Then I uploaded them into Canva and played around with a few filters before selecting X-Pro+
So that took care of four of the frames... and for the others I purchased some Snoopy quotes that I liked.
I had purchased nine frames thinking that I was going to do a 3 x 3 landscape grid... but then my photos and quotes were all portrait oriented so I had to find out if that was going to work.
I'd purchased a laser level after borrowing one for another project and it was super handy for this project... especially when I realised that it would fit on my camera tripod... happy accident!
I cut out the frame sizes from brown paper and used painters tape to put them on the wall to see if I liked the layout... ummm NO
Back to the drawing board... I decided on a 2 x 4 grid and taped that to the wall.. MUCH better.
Then I marked my corners carefully (thankfully) and decided to wait until the next day to make sure I really liked it. I was so pleased I'd marked those corners because the next morning I discovered most of my papers were on the floor! At least I knew the tape hadn't damaged the wall paper.
The next step was placing the Command hooks... I was VERY careful to follow the tutorial AND the instructions on the packet.
- Wipe walls with isopropyl alcohol - CHECK
- Stick the strips together until they click - CHECK
- Remove one side of the liners and stick to the frame - CHECK
- Take off the remaining liners and press firmly onto the wall - CHECK
- Remove the frame and press each strip on the wall and the frames for 30 seconds - CHECK
- Wait 1 HOUR for the adhesive to build - CHECK
- Press frames back into place until the strips click - CHECK
So at this point I thought - that looks pretty good... great job Shelley!
And then I saw the frames side on and noticed that because I'd used white Command strips they were super noticeable.
I tried to leave them... but my 'perfectionist' genes just wouldn't allow it. As it turned out, even though I thought I'd read ALL the instructions... there was one important one that I'd missed completely... DO NOT HANG ON WALLPAPER!
It turns out that they pretty much just peeled off super easy with no damage to the wallpaper at all. Hmmm that wasn't what I was hoping for. In fact, they came off so easily that one of the frames fell off the wall before I realised what was happening and the frame broke... lucky I still had one spare thanks to changing my grid!
So... I had another think... the purpose of the Command strips for this project was to get the frames lined up perfectly... and since I own the house and don't have to worry about what a landlord would say there was a super easy solution... staple gun!
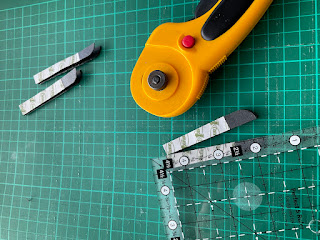
Back to the shop I went and purchased some black Command strips... and this time I cut them in half lengthwise so that I could have them on both the top and bottom of each frame.
I had the frames all ready to go:
In the end the frames went up absolutely perfectly... and the view from side on with the black Command strips is so much more pleasing to the eye.
The only thing left to do was to re-hang my bee print (which I bought in Cambridge in 2023)
Here's a glimpse of what the eight frames contain:
It's safe to say that I LOVE how the gallery wall turned out!


No comments:
Post a Comment
Hi :) If you want to comment I'd love to hear from you.
Shelley xx