Sunday 12 June 2016

The roaming gnome gets some clothes!

Hello, after sitting on the table for a week, it was time for my wee gnome friend (from My Favorite Things You Gnome Me) to get some clothes. 

All of the colouring was done with Peerless watercolours... I love how vibrant the colours are and how nicely they blend on watercolour paper.  I started off using Scarlet Lake for his hats and buttons.  His boots were coloured with Pearl Gray.

Next I used Deep Blue for his pants and braces.

His shirt was a blend of Dark Green and Grass Green and I love how vibrant it turned out!

Once all the gnomes were coloured I felt that they needed a bit more of a base to stand on so I watercoloured the bottom edge with Evergreen Bough and Weathered Wood Distress inks.

That turned out a little brighter than I wanted so I added some Pumice Stone Distress ink over the top to give the base a bit more depth.

By now I had five card fronts that I was pretty happy with but I knew they needed a bit of 'finishing off'.

Of course they needed a sentiment and luckily for me the courier delivered a wonderful parcel of Unity stamps during the week and there was a little sentiment stamp in the packet that was perfect for this little guy.

I also decided to use a little bit of washi tape along the top of the cards and I love how it turned out.  While I was adding the washi, I backed my card fronts with some black cardstock.

The final step was to add a little rhinestone to the center of each flower on the sentiment.  I went with red, blue and green rhinestones since that was the colours of the gnome clothes and here are my finished cards (remember to click on the photos to see a close up view):

Thanks so much for visiting my blog today xx
    

Saturday 11 June 2016

A Gnome on the roam!

Hi there :)  Last weekend I woke up with a 'roaming gnome' on my mind.  While I was tidying up some of my supplies I stumbled upon a NBUS (Never Before Used Schtuff) stamp set... Tim Holtz' Cityscapes.  I vaguely remember purchasing this stamp set but clearly whatever idea I'd had when I bought it had slipped from my mind!  I decided to have a go at something a little different so here's how it went.

I started off by stamping each of the cityscapes onto some plain white card using Rangers Cool Graphite ink so that it had a 'soft' feel to it.

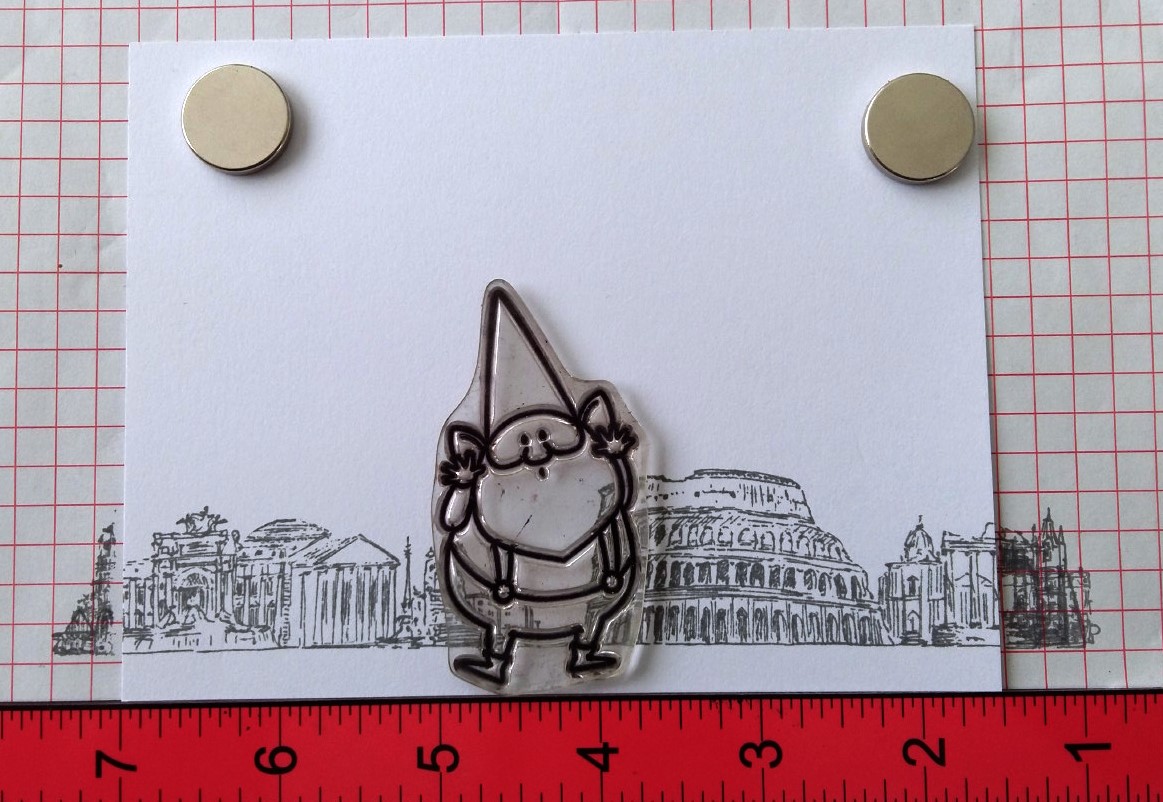
Next I grabbed one of my gnome stamps from My Favorite Things You Gnome Me.  I like the little guy with 'jazz hands' because he looks like he's waving.  Since I wanted the cards to be a set I placed my gnome in the MISTI and then I moved the backgrounds left and right until the gnome was in the right place for each individual cityscape.

I stamped the gnomes onto some watercolour paper since I wanted to do quite a few techniques on the cards.  It actually didn't take long to get them all stamped and heat embossed.  You can see the individual cityscapes sitting underneath the gnomes so that I knew which backgrounds were going onto each gnome.

Next I got out my masking fluid and carefully painted over all of the gnomes.  It's surprisingly easy and it worked even easier with the embossed images.

I left the gnomes to air dry... it's super easy to tell when the masking fluid is dry because it changes to a more yellow colour.

Next it was back to the MISTI.  I put each individual background back into the MISTI and lined it up with my previous stamped image.

Then I placed each stamped and masked gnome into the MISTI to give them their backgrounds which I stamped with the Ranger Cool Graphite ink.

Using the plain card images certainly made the stamping process much easier and I was thrilled when each card front turned out perfectly!

Now for some colour!  I did a bit of a wash over the background images with Pumice Stone and Weathered Wood Distress Inks.

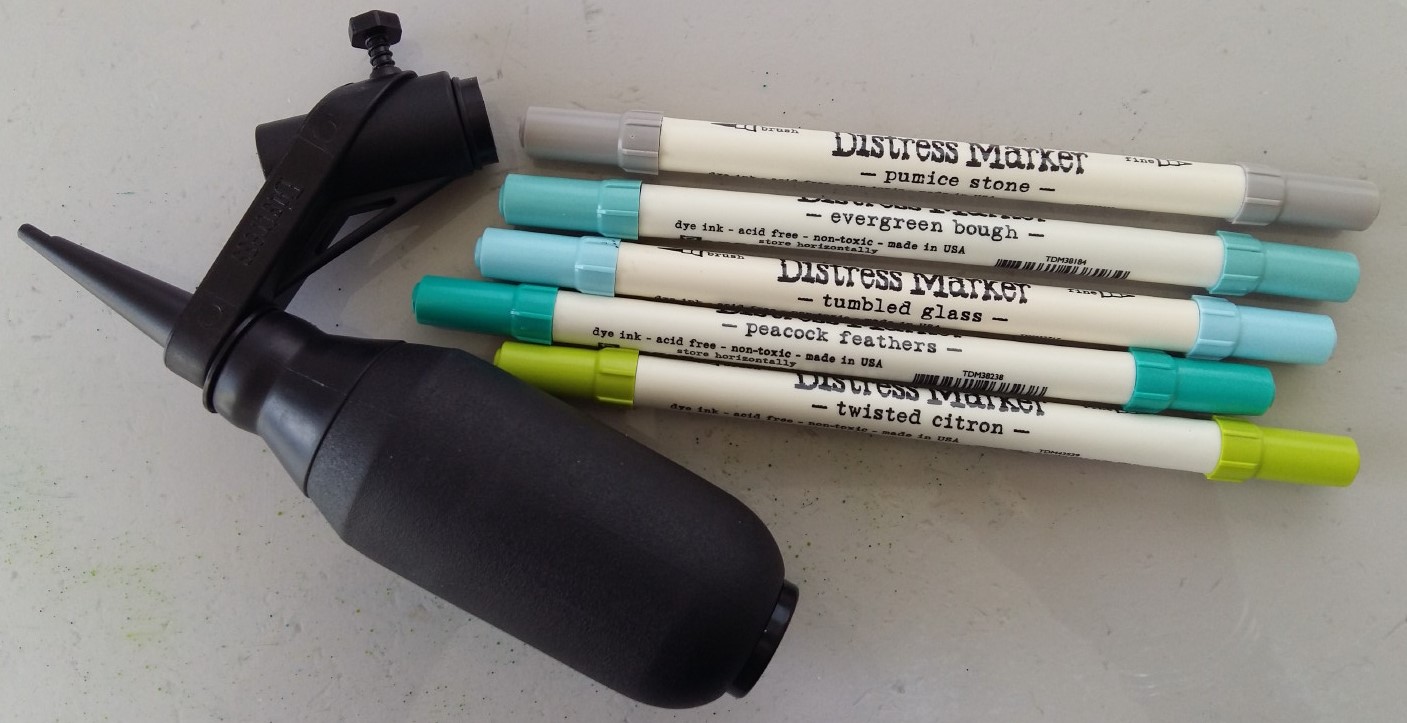
Then for something completely different I opened my brand new Distress Ink spritzer tool.  I was actually super lucky when I went to purchase mine because it scanned up at HALF the price on the ticket!  Yay!!!  I chose quite a few colours to give a light mist with: Pumice Stone, Evergreen Bough, Tumbled Glass, Peacock Feathers and Twisted Citron Distress Markers.

I was thrilled with the effects... and super pleased that I practiced on a bit of scrap paper first too!!  I didn't want to colour in the cityscapes... I just wanted to give a bit of colour to the overall background.

Once I was happy with the background I gave it a quick blast with the heat gun and then it was time to unmask the gnomes.  I had a bit of a 'learning curve' with this... I did my first gnome:

BLAST... bugger... damn... ink where I DIDN'T want it!  You can see it on his cute little gnome face and on his pants.

I couldn't figure out WHY I was getting ink on my card... especially since I'd dried it with the heat gun... and then I figured it out... the ink was sitting on top of the masking fluid!!  DUH!!!

I grabbed a paper towel and dried all the ink off the next gnome:

Then I removed the masking fluid and VOILA... no ink where it shouldn't be!!

Not to panic about the first wee gnome... I just painted over the ink that was on the gnome with my water brush and then used some paper towel to 'lift' the colour and it worked perfectly.

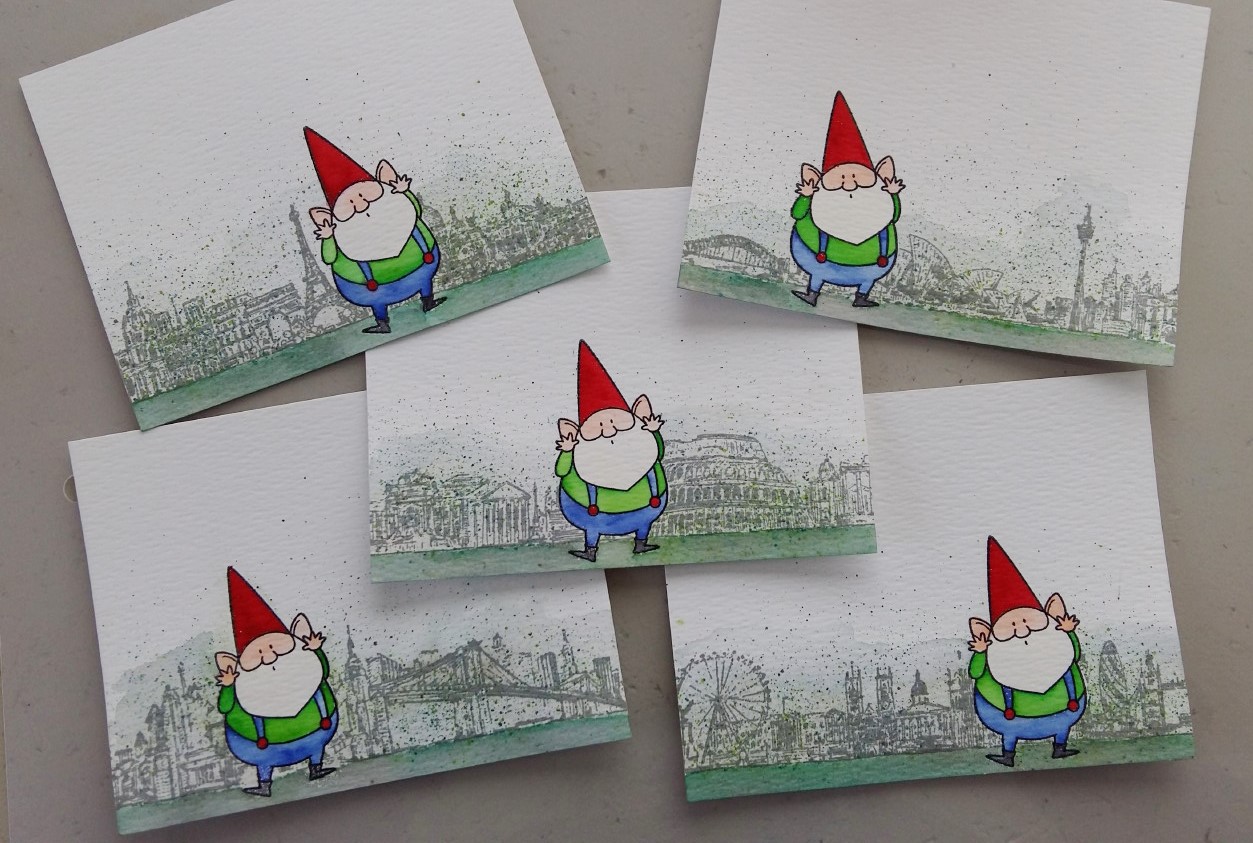
Here's my unmasked gnomes all ready for their colour to be added:

By the time I'd done all of these card fronts it was getting a bit cold in my art studio... there is a definite drop in temperature around 3.30pm!  I took my wee gnomes upstairs along with my Peerless watercolours and added some Flesh Tint to all their faces, hands and ears.

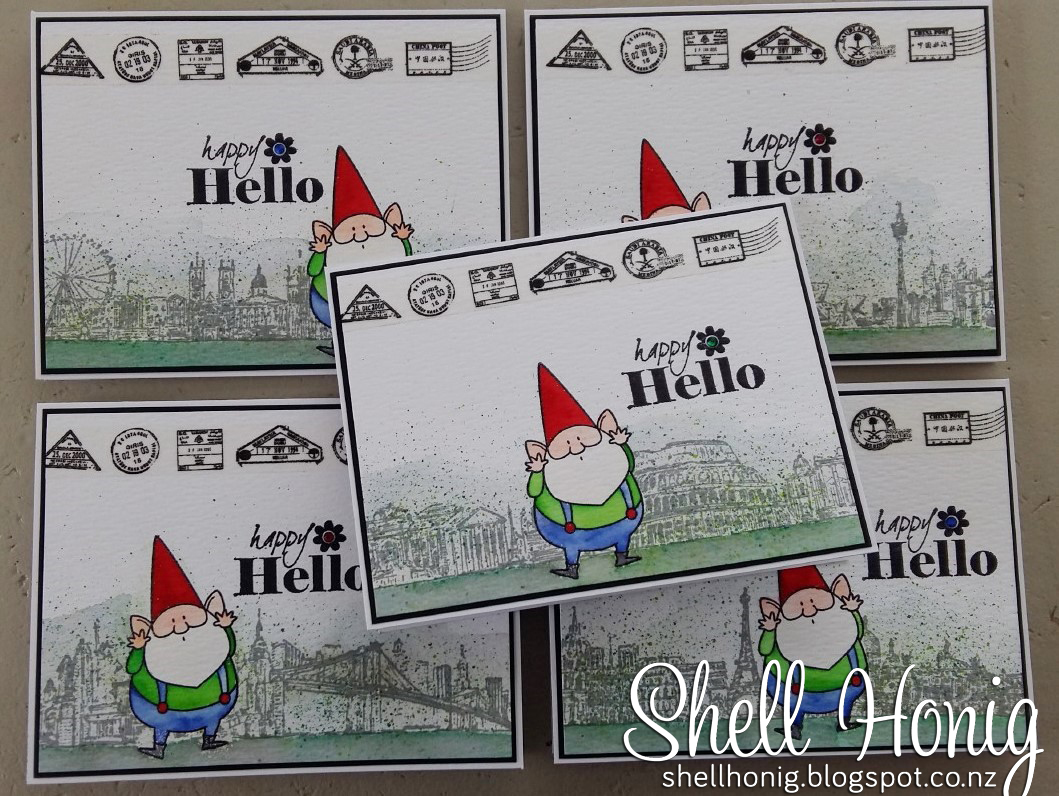
That brought my Queen's Birthday weekend to a close and my poor wee gnomes sat on the table for the entire week waiting to get their clothes!  I'm happy to report they are now fully dressed but I'll show you that in my next blog post.

Thanks for visiting xx
     

Queen’s Birthday Honours: Tony Pope

Sometimes in life you meet people who inspire you and Tony Pope is one such person.  Many years ago I had a brain aneursym and I didn't know if I would ever be able to teach full time again.  Through a lot of determination it did happen... but Tony was the Principal who took a risk in hiring me. 

I remember him offering me a full time teaching position and having to tell him that I wasn't sure if I was up to it.  He simply said... do your best and if it's not working come and see me and we'll make some adjustments.  So I took on the position and never looked back.

I worked with Tony for a number of years and he became not only my Principal but also a mentor and friend.  I'm so very proud to know him and it was wonderful to see him get acknowledged in the Queen's Birthday Honours.

Former Rotorua principal Tony Pope is made a member of the New Zealand Order of Merit.

Check out this newspaper article to get all the details.

At the end of each school year Tony used to do a speech for the students moving onto Intermediate school and almost every year he included this great quote from John Wesley:

“Do all the good you can. By all the means you can. In all the ways you can. In all the places you can. At all the times you can. To all the people you can. As long as ever you can.”


John Wesley

I don't know how many of the kids remember this quote but it's stayed with me and continues to inspire me.

Monday 6 June 2016

No more PEACH toilet for me!

When I bought my house almost 10 years ago there were a couple of things I REALLY didn't like... one was the peach coloured toilet, vanity, bath & shower (everything was peach!) and the other was the MUSTARD colour on the walls in the laundry, kitchen, bathroom and toilet.  It looked a lot like this:

This photo taken back in 2007 doesn't really show how horrible the situation really was.  The walls look a lot lighter in the photo but trust me... they really were the mustard colour I just showed you!

In 2013 I decided that I really couldn't live with the mustard any longer so Mikayla and I removed all the painted wallpaper.  Notice that I included Mikayla in there as if to lesson my own culpability! Over the course of a few days we managed to remove all the wallpaper and it actually looked better with the plain walls.

I had excellent intentions of at least painting the walls but then I ended up moving to Gisborne and nothing got done.  Fast forward to May 2016 and we were still living with the peach toilet (and the vanity, bath and shower) and no wall paper or paint on the walls.

A couple of weeks ago Michael asked me to meet him at Bunnings (I was right to be suspicious that he was up to something!).  He said he wanted me to check out some paint colours... and while we were there he suggested I might like to make use of their toilet.  When I asked him why he said... "because we don't have one at home at the moment!"

It turns out he'd seen a $99 WHITE toilet in the Bunnings brochure and decided that he would do a toilet makeover.  He honestly does do projects on the spur of the moment... and they completely consume him while he's doing them... EVERY conversation leads back to his current project LOL

So this is what I came home to:

Not only had he removed the toilet but he'd decided to remove the floor tiles as well.  I actually didn't mind at all because I've never particularly liked the tiles. 

Michael quite likes doing a bit of demolition and it didn't take him long to get everything removed:

Next he laid down a new wooden floor made from some cool tongue and groove laminate flooring.  He'd never used this product before but he talked to the man at Bunnings and did a bit of Googling... and I have to say that I was pretty impressed with it.

Here's the finished floor with the toilet semi installed:

7 HOURS after he started the toilet was fully installed and operational!

Unlike me, Michael doesn't go onto a new project until the current project is fully done... which is actually a very good thing.  Over the next few days and ALL of the following weekend, Michael got busy sanding, prepping, priming, and painting.  Now the toilet looks like this:

AMAZING!!!  The ceiling, window surrounds and the trim are all painted white and the walls are a really soft grey.  My cane basket of toilet rolls goes perfectly with the new floor boards too!  We bought a new white toilet roll holder to go on the wall and the only thing left to do is find some white window latches to install.  The only ones we've found so far are ridiculously expensive.

Check out the difference (click on the photo to see a larger view):

I'm really thrilled with how it turned out... and now Michael has plans for doing a makeover in the bathroom as well... but first he's got another project on the go which involves MANY trips to Bunnings, a sledgehammer, some decking timber... and my clothesline! 

Happy Monday xx
   

Saturday 4 June 2016

New stamps mean new cards!

Hi :)  A couple of days ago a new order arrived for me from Simon Says Stamp and one of the goodies in my parcel was a new stamp set from Mama Elephant.  This one is called Organic Blooms:

I really like that the flowers fill up most of the card and there's lots of sentiments to choose from which makes it a very versatile set.

I decided to start off by stamping the flowers with Versamark and then heat embossing the image.  I did one using white embossing powder and one with Ranger's Queen Gold powder. 
 

I decided to watercolour the stamped images with Distress Ink because I wanted them to be lovely and soft.  For the white embossed image I used Rusty Hinge, Dried Marigold, Bundled Sage and Forest Moss Distress Ink along with my water brush.

When I was happy with my colouring I added some Evergreen Bough Distress Ink around the image to give a bit of depth.  The sun is pouring through my art room windows which makes it lovely and warm but not the best for taking photos.

Next I took the Queens Gold embossed image and coloured it using Victorian Velvet, Aged Mahogany, Bundled Sage and Forest Moss Distress Ink.

The two images feel quite different... the Rusty Hinge/Dried Marigold card feels light and fresh while the Victorian Velvet/Aged Mahogany card feels quite vintagey... I'm not sure if it's the colours or the embossing powder... probably a combination of the two. 

Once I had all the colouring done I left them to air dry and I chose a couple of sentiments which I stamped with black ink onto some watercolour paper off-cuts.  Then I trimmed them up and added them to the card fronts along with some tiny rhinestones.

Here's how the cards turned out (if you click on the photos you'll be able to see the detail much clearer):


And here they are again:

It's been a very productive morning in my art room... I've got a horrible head cold which kept me home from work yesterday but the sun shining in through the windows this morning is fabulous!

Thanks for visiting xx
  

Friday 3 June 2016

It's all about personalisation!

Hi there :)  Since I've really been getting into my card making I decided that it was time to get a personalised stamp made to stamp the back of my cards.  I've seen lots of USA websites offering this service but I wanted something a little closer to home so I did a bit of Googling and discovered that Montarga stamps offers customisable stamps.

After viewing the HUGE range of stamps available I came up with one that I liked:

You also get to choose the font you want your stamp to have (I chose American Typewriter):
I ended up giving Montarga stamps a call to discuss a couple of options for my text and I have to say that they were SOOOO helpful!  After going over my ideas we came up with a final design and I ordered my stamp via the website.  I was even able to get my stamp un-mounted so that I could use it in my MISTI.

The following morning my stamp was on the courier!  Excellent service.  When I opened the courier bag I was greeted with a cool little parcel:

Here's my stamp:

Since I didn't want my stamp to take over I decided to use Ranger's Cool Graphite ink... it's a lovely grey... not too overpowering but not too subtle either.

I've gone through and stamped the backs of ALL the cards I've made over the past couple of months. Here's a set of cards I stamped:

I'm really happy with how the stamp turned out... and I"m super happy with the service I received!

Thank you Montarga stamps xx