
Before I start I want to say that all the links for the products will take you to the Simon Says Stamp website because that's where I get a lot of my supplies. It's getting harder and harder to buy anything I want in New Zealand now which is such a shame but I do buy local when I can.
The inspiration for this card came from something I'd seen on the internet by Laura Bassen... super loved her card so I had to give it a go myself.
For this card I used Simon Says Stamp Warm Christmas Wishes stamp set and the Warm Wishes Die set.


I've been playing around with my stamps and dies to see which way I prefer to do it... die cut and then stamp or stamp and then die cut. I've found that what works best for me is to stamp and then die... it just seems to work better (and quicker) for me... especially if I'm also heat embossing the images (which I tend to do most of the time).
I started off stamping all my images onto Tim Holtz Watercolour cardstock with black Hero Arts Dye Ink and then heat embossing all the images with Ranger Clear embossing powder.
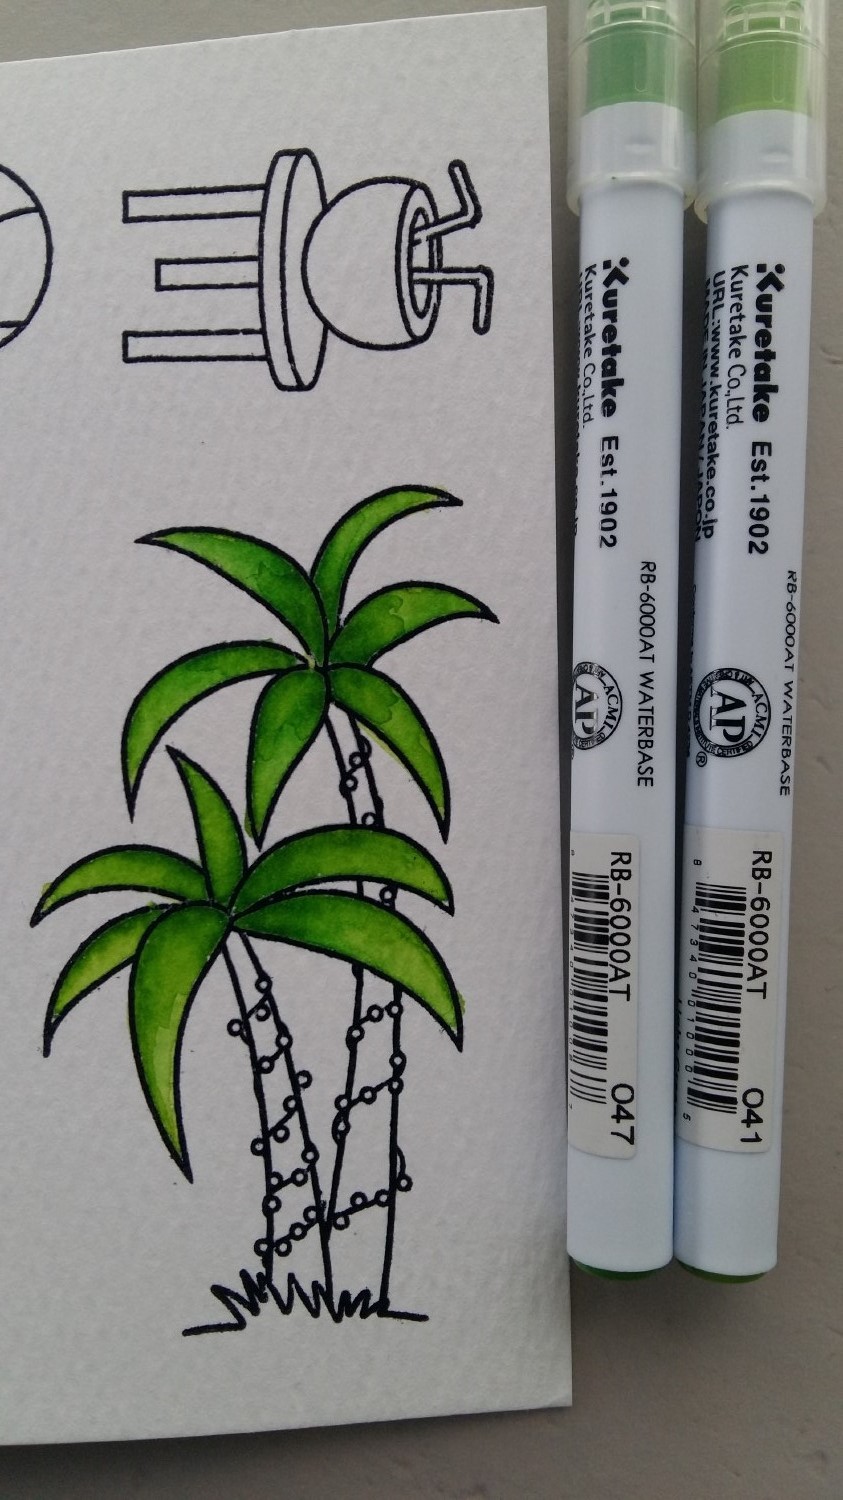
Next I got out my Zig Clean Color Real Brush Markers... I LOVE these markers! I've quickly become a HUGE fan of them. They're so easy to use... love the range of colours... and totally love the way they blend with water and each other to create a super smooth look. Plus they're really VIBRANT! I feel like I get the look of Copics with the ease of watercolour... and that works for me!
I started off colouring the palm leaves with 041 Light Green & 047 May Green. I also did some of the surf board and beach ball with these colours.
Next I used 032 Persian Blue & 050 Yellow to add some colour to the surf board, beach ball and Santa's boxer shorts.

Since I was on a roll with my colours I decided to add a real rainbow effect to the rest of the beach ball and surf board with 070 Orange, 027 Dark Pink, 024 Wine Red & 080 Violet.

Next came the trunks of the palm trees with 060 Brown & 068 Deep Brown.

While I was working with the browns I did the table in 068 Deep Brown & 062 Dark Brown.

I was starting to get the hang of the colouring techniques by now so I started on Santa's face with 071 Flesh Color.

For Santa's hat I used 260 Deep Red & 024 Wine Red.

For the rest of Santa's boxer shorts I used 042 Turquoise Green & 033 Persian Green.

I wanted to leave Santa's singlet pristine white so I decided to add a little bit of colour to his beard using 097 Pale Gray.

And since it was Christmas I HAD to add a little bit of glitter to Santa's hat with my Wink of Stella pen.

After all that I decided that Santa really needed some sun classes to protect his eyes from the UV rays so I stamped and embossed some glasses on a scrap of watercolor paper and then I used 031 Cobalt Blue and 036 Light Blue to colour his lenses and some 090 Gray to colour the frames.

Then it was time to start assembling the card. I cut a piece of 'sand' from watercolor paper using Mama Elephant Borderlines Trio dies. I added a base of colour using Antique Linen Distress Ink.

To help me create the 'sand' effect I used Antique Linen, Old Paper and Scattered Straw Distress Markers along with my Spritzer Tool. I really love how the 'sand' turned out!

To create the horizon and sky I used Cracked Pistachio & Peacock Feathers Distress ink and blended them together creating a more intense blend along the horizon line.

Then it was time to put my two background pieces back together again.

A few months ago I saw the Mama Elephant Jingle Greetings stamp set and I knew I HAD to buy it so I used one of the sentiments along with some Ranger Liquid Platinum embossing powder. I really love how the sentiment turned out!

Then came the fun of assembling all my coloured images on the card. I got so caught up in what I was doing that I didn't take any photos but I can tell you that some things are flat on the card and some have been adhered with foam tape.
And here's my final card (click on the photo to get a closer view):

I'm still really happy with how it turned out... maybe I'll be ready to part with it for Christmas 2017!
Miss Krystal (24) said to me yesterday that I need to think about doing video tutorials... apparently that's 'where it's at' now. What do you think... photo or video tutorial? I'm not sure if my kiwi accent is ready for the internet LOL
Thanks so much for visiting xx
Love the card Shell and definitely do a video tutorial. Your kiwi accent will be fine. xxxx
ReplyDeleteThanks Jeanette... I might just have to give it a go :)
Deletelove your card Shell, and I can see why you did not part with it :-). Have you tried buying from Memory Crafts here in NZ - they have a pretty good range of stuff. Like you I prefer to shop local, but also do go overseas when needed
ReplyDeleteBlessings
Maxine
Hi Maxine... yes I've bought a couple of things with Memory Crafts :)
Delete