Showing posts with label Art Studio. Show all posts

Saturday, 21 May 2016

More organising in the art studio

We've had such a busy week at school this week... and to be honest I haven't had 5 minutes in my art studio to create anything!  I did steal a little bit of time last weekend though to continue my organising... and I LOVED it.  I think I might secretly be a little OCD about my storage solutions!

I've previously shown you how I'm using Jennifer McGuire's storage tips with most of my stamps... and it certainly works for me.  My baskets with the stamp storage pockets and dividers is fabulous and I'm finding it much easier to find what I'm looking for.  PLUS... having all my things organised really does make me HAPPY!


One thing that I hadn't worked out yet was how to store my Ranger stamps... mostly Tim Holtz ones but I've got a few Dylusions sets as well.  They were far too big for the regular stamp storage pockets and besides... I quite liked the idea of keeping them separate from the other stamps.

When Esther came up in January I had ALL my Tim Holtz stamps out on the table and we had them EVERYWHERE!

To be honest, that photo doesn't show how bad the situation really was... I had stamps missing... stamps on the 'wrong' storage sheets... everything mixed up... it was a MESS!

I REALLY liked the pocket idea and it got me thinking... what if I could use much bigger pockets??  So I went hunting and came up with the perfect solution for me.  I bought a packet of A4 heavy duty expanding pockets!  They were the perfect width and depth but way too tall so I chopped the tops off with my guillotine!

Then I got out my label maker and got organising:
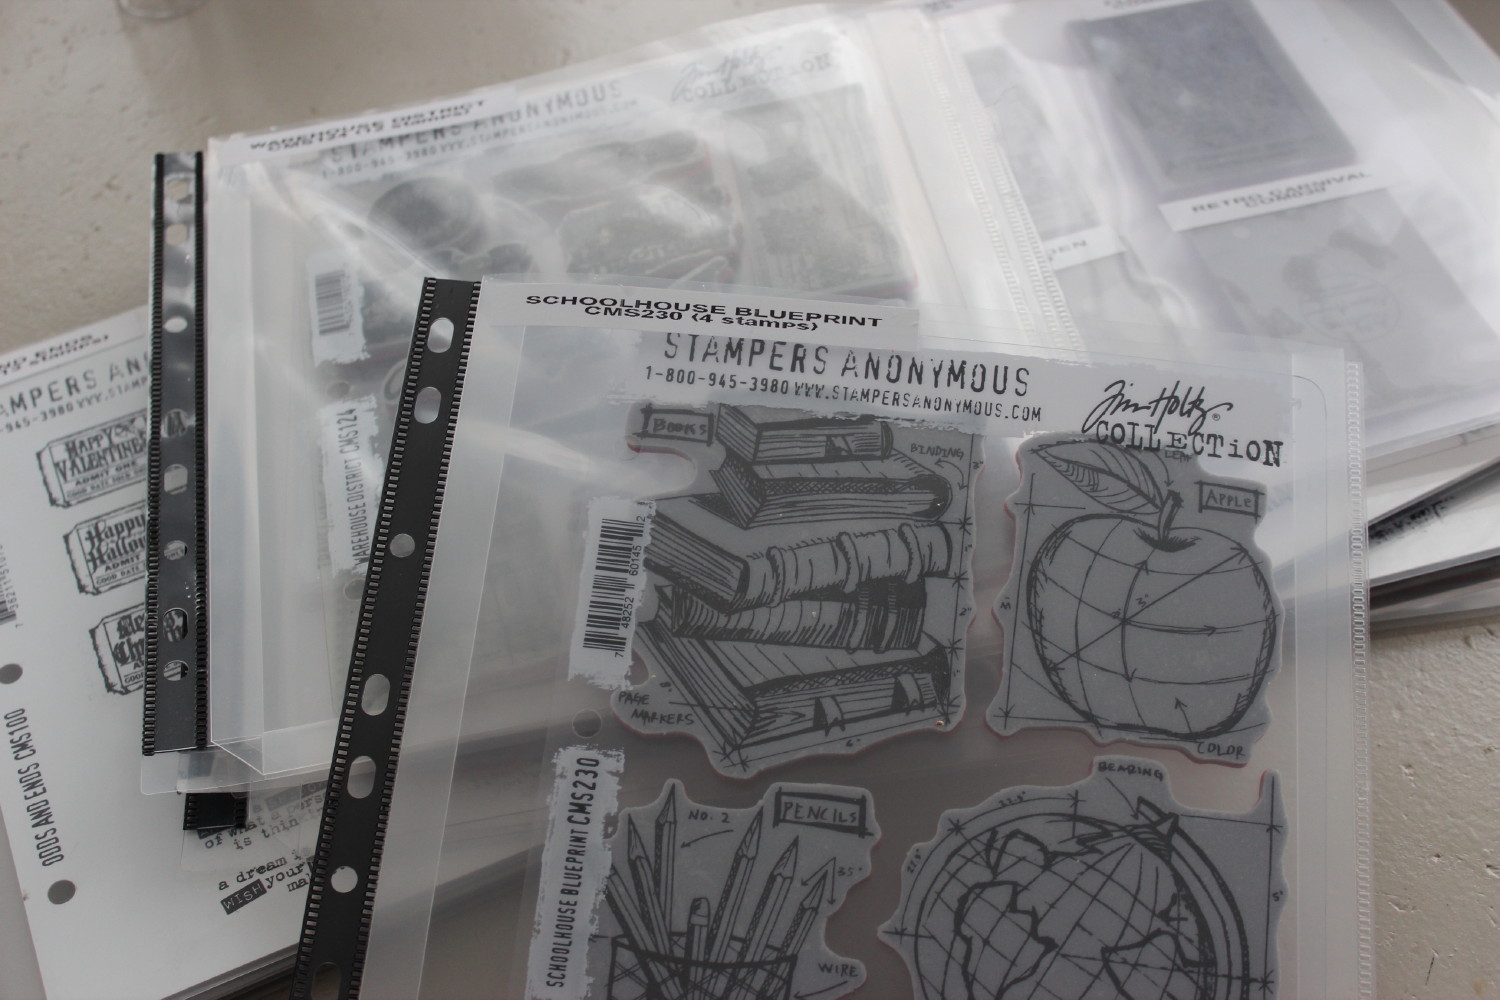
Each pocket is labelled with the name of the stamp set, the individual code and how many stamps each set contains:

As I was sorting the stamps out I found that lots of the stamps weren't sticking to their storage sheets so I jumped back on the internet and searched out some stamp cleaning ideas and found two really fabulous 'home made' stamp cleaner recipes.

The bottle on the left is my Glycerol and baby shampoo cleaner and the bottle on the right is diluted Simple Green.  The Simple Green recipe I made works fabulously on some of the more difficult stains and the glycerol/baby shampoo recipe smells divine and actually conditions the stamp rubber as well!

I now have a stamp cleaning container complete with extra 'ingredients' for making more cleaning solution, an old tooth brush and my super clean stamp blocks!

Getting back to the stamps... by the time I'd finished cleaning and sorting my stamps I'd actually managed to find ALL of my stamps.... SO HAPPY!  Then I needed a container for storing all the stamps in.  My cane baskets weren't wide enough and I didn't want to hide them away after going to all the effort to have them well organised.... and then I remembered that I had an old antique suitcase that would be perfect!


I think Tim Holtz himself would be happy with this storage solution!

At the moment I've got the suitcase of stamps sitting on my big table and it's fantastic!  Best of all, there's still room to add more stamp sets to the suitcase LOL

Before I go, I thought I'd share an amusing little snippet from this morning.  Krystal came inside to have a chat and she decided to have a toasted sandwich while she was talking to me.  Within SECONDS she had TWO sets of eyes watching her and hoping against hope that she would give them a little morsel!

It reminded me of a picture I saved from Pinterest last year:

Here's our version of the picture:

Toby sat all the way through Krystal eating her sandwich... Nivea only sat once Krystal got down to the last of it... the desperation was setting in by then!  In spite of them sitting so nicely there were NO tasty morsels for puppies!

And if Toby could have opened the fridge by himself he would definitely have done this!

Thanks so much for stopping by my blog today... I hope you're having a great weekend xx

Friday, 29 April 2016

The Art Studio is coming together!

It feels like it's taken AGES for me to get used to having the art studio but I'm really starting to make it my own space now.

I thought I might show you a few of the 'decorative' things in the room... things that make my space feel like it actually belongs to me!

Two weeks ago, Krystal and I drove to Napier for the day to meet up with my sister and her friend.  For those that don't know it's about 220 kilometres each way... probably crazy to go just for the day but Krystal had to work on Sunday so we had to be back.

It was a totally fabulous day!  My sister and her friend drove down from Gisborne and we arrived in Napier within 5 minutes of each other.  They were staying the night so we all met up at their hotel before heading into town for lunch.

Then it was time for a spot of shopping and in Michael's words my wallet was 'hemorrhaging' money by the time I'd finished LOL   It was well worth it though!

First up I bought a cool metal flower to go on the wall.  I really love the red!

The metal flower is fixed to the back wall of the art studio so you see it as soon as you walk in.  It's right beside the TV that's on the wall and it really does add a pop of colour to the room.  I have the TV hooked up to my computer so that I can watch You Tube tutorials and it's brilliant!

At the next shop we visited I found a really cool gecko/lizard.  He's also made of metal and I love the bright enamel colours on his back.

For months now I've been thinking it would be nice to have all my Distress stains and paints displayed.  Partly to make them more accessible and partly to add some more colour to the room.  I've looked at several options but none of them seemed right for me.

My sister took us to a really cool shop in Napier and as I was looking around I found the PERFECT solution!  I knew as soon as I saw it that it was right for me and when I showed my sister she totally agreed.  Getting it into the car with the four of us also in there was a mission but we managed.

There was exactly enough room for all my gorgeous bottles of colour and on the bottom shelf I've got all my embossing powders along with my stickles, liquid pearls and enamel accents.  I'm using one of the drawers for my Versa cube and embossing buddies and I'm sure I'll find a use for the other two drawers.  I've also got a hook in the wall (to the right) so that I can hang my extra long rulers... super handy to have them ready and accessible.

At the same shop, I came across a big metal 'S'... Tim Holtz would love this shop!!!  The 'S' is about 12 x 12 inches and 2 inches deep.

I have it on the same wall as the printers tray I did a couple of years ago and they look great together!

Also hanging on this wall is the wall quilt I made several years ago.  I used to have it hanging in the house but I think it suits my art studio so much more.

At the other end of the wall I wanted more colour.  Several years ago... actually probably about TEN years ago... I got right into doing jig saw puzzles.  We glued several of them to backing boards with the intention of framing them.  Little did we know how much the frames were going to cost!

In the end I gave all but one to the second hand store but there was one that I just couldn't let go.  I loved the picture as well as the colour and just recently I managed to find a frame to fit it in a Farmers sale!  I did have to paint the frame to help it match into the room a bit more but I love the end result!

Right beside the doorway I've finally put the coat hook Toby gave me for Christmas a couple of years ago.  I think I'll use it a lot as we move into the winter season.

Down by my desk I have some great shelves that Michael put up for me.  I use two of them to house my antique camera collection and I've also got a fabulous room atomizer that scents the room with vanilla... so lovely when you walk in the door and the room smells divine!

On the bottom shelf I have the cool clock I found while Michael was still making the art studio.  It was a fabulous find and actually it's quite a large clock... it stands about 12 inches tall!

While I was downstairs in my art studio yesterday I had Toby for company.  He and Nivea have got a blanket to snuggle up on and Toby was quite happily having a wee snooze.  Nivea had come for a short visit but decided she didn't want to hang out with Mumma.  I should have KNOWN something was going on because she was SO QUIET.  This is what I came upstairs to find:

Miss Nivea has had a wonderful time pulling the foam mattress from Toby's old day room apart!  Luckily we can just put all the pieces in the rubbish bag and call it done!

To finish off today's blog post, I've got a tiny bit of creativity.  I spent some time early this morning colouring some of my stamped images using the Peerless watercolours and I love how they've turned out!  Now all I need to do is turn them into a card!

Thanks so much for visiting my blog xx

Thursday, 28 April 2016

A little bit of this and a little bit of that :)

Hello again :)

I don't have any cards to share with you today... my mind has been on other things... mostly on organising my art studio!  I'm still not ready to share the ENTIRE room but there's still lots of snippets to show you.  LOL

First up, I mentioned in the blog post I did yesterday that the courier man had just arrived... and he bought me some wonderful new goodies including another stamp and die set.  This time it's Simon Says Stamps Warm Christmas Wishes.
Oh my goodness!!  This Santa set is super cute!  I knew I wanted to do some watercolouring using these images so I set about die cutting, stamping and heat embossing a heap of images... enough to do several cards because I had multiple ideas running around in my head.

It took ages so I took the die cuts upstairs so that I could watch a documentary while I was stamping and heat embossing them.  Here's the results of all my efforts:

Super pleased with how they all turned out.  The images were super crisp and I know I'm going to have fun colouring them... but all that had to wait because I had several appointments in town.

By the time I got home it was after 7pm and to be honest I was too tired to watercolour... besides the lighting in the lounge isn't really ideal for fine work and my knee didn't want to go downstairs to the art studio! 

This morning I got up bright and early and decided that I was going to start organising my stamps and dies... starting with my most recent purchases.  I've been watching how different people organise their supplies and trying to decide what will work for me and I think some of Jennifer McGuire's tips are my solution.

Another item that arrived in my parcel of goodies were some stamp pockets.  I'd seen how Jennifer organised her stamps and I'm a bit like her... everything needs to line up neatly and be in the same type of containers LOL

Here's the start of my stamp organisation:

I also decided to organise my new dies.  I'd already purchased some of the Sizzix/Tim Holtz storage envelopes.

I'd already bought several packs of these because they're the same as the envelopes/pockets that Tim Holtz's thin dies come in.  I really like how thick they are and how secure the dies are.  I labelled them exactly the same way I did my stamps.

It was at about this point when Krystal decided to come and join me.  She quite enjoys just chilling out with me in the art studio... although she often complains that there is NOWHERE for her to sit and draw because I've got stuff EVERYWHERE!  Today she perched herself at the table and put her drawing on my guillotine.  She even let me take a photo of what she's working on... can't wait to see the finished piece!

Then I headed into town to have lunch with one of my girlfriends... did I mention that I LOVE the school holidays??  After lunch I did a bit of 'organisational' shopping.  I wanted to make some dividers for my stamps and dies and following Jennifer's ideas I headed to Warehouse Stationery and bought myself some really reasonable plastic folders by Kookie.  I really loved the bright colours and they're pretty sturdy too.

When I cut up the folders I managed to get four dividers from each folder so they work out at a mere 75 cents each!

After cutting the folders I opened the corner punch I bought two YEARS ago and haven't used.  It cut through the plastic really well.

Then I used my label maker again and named the dividers... so AWESOME! Of course I had to put everything into alphabetical order as well. LOL

Next up I used a green folder to make dividers for my dies:

And here the baskets are side by side:

My last piece of organising for the day was for my new sequins.  I decided to use a container that matches the one I'm using for my rhinestones... and it's perfect!

So there you have it... lots of organising!  I must admit that it makes me smile to see my room coming together the way I want it to.

Thanks for visiting xx