Showing posts with label Tutorial. Show all posts

Sunday, 3 September 2017

Shake, shake, shake... shaker cards!

Hi there :)

Remember when I was commissioned to make the space card for a little boy who was turning 3?  Well his younger siblings were celebrating their first birthday within a couple of days of him and I was asked to make their birthday cards as well.  Since they're twins I made cards that were 'the same but different'... here's the finished cards:

I made the wee boy's card first using MFT's Happy Hippos and Balloon Shaker Window die set.  I started off with a piece of watercolour paper that was die cut using my ever faithful stitched rectangles die... I think this must be my most used die I own!  I then watercoloured some Distress Ink onto the paper using the 'wet on wet' technique with Mowed Lawn, Blueprint Sketch and Fossilized Amber.

While I had the inks already on my craft sheet I used the rest of the ink to colour the die cut balloon frame... love how that turned out!

Next I die cut the opening for the shaker card... make sure you have a pretty good idea of where everything is going on your finished card so that you have room for everything... just saying LOL

Then it's time to start assembling the shaker card... this is the really fun bit!

Along with the Balloon shaker pouch from MFT I used some Ice Cube Jewels and Lagoon sequin mix from Little Things from Lucy's Cards.   I've got a growing collection of pretty things from this company and apart from looking cool in shakers they are also delightful to look at on my shelf... and I do like pretty things :)

I loaded up some of the sequins and the ice cube jewels into the shaker pouch and then ran some glue around the edge before sticking it down onto some glitter cardstock.  Multi Medium Matte is definitely my 'go to' adhesive for this kind of thing because it sets quickly and extremely securely!

The next step was to adhere the shaker pouch to the back of the card front using some more adhesive... that sounds more complicated than it should... take a look at this photo and you'll see what I mean:

Next I added the balloon frame and the 'string'.  At this point I also realised that I hadn't stamped my sentiment on the card front but thankfully the shaker pouch is relatively the same depth as the MISTI magnets so it wasn't even an issue. 
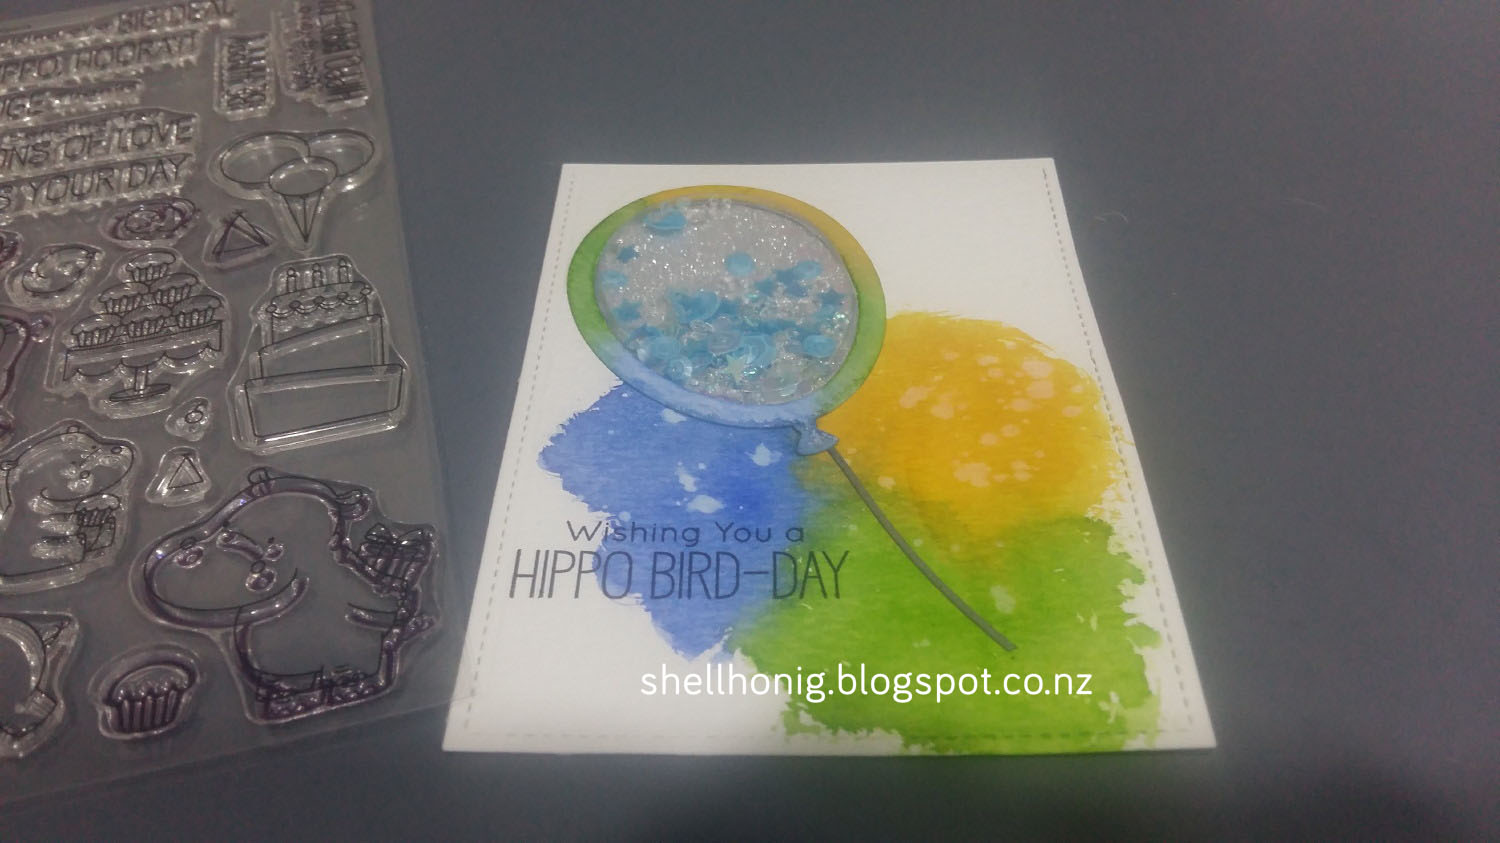
Time to add my pre-coloured images... a cute litte hippo and a wee bird.  I die cut some foam to give them extra dimension and it worked really well.  At this point, I layered the card front onto some dark blue cardstock which really made the colours pop!

I added another hippo to the inside of the card:

And here's the finished card:

And now for 'the same but different'... since I'd already worked out my basic design, the second card came together really easily.  Colour the watercolour card using Distress Inks - Picked Raspberry, Worn Lipstick and Wilted Violet. 

I coloured a balloon frame as well and die cut a window for the shaker pouch:

This time I used some more Ice Cube Jewels along with 'Magic Wand' sequin mix for the shaker pouch:

At this point Michael came into my craft room and I forgot to get a few of the photos I wanted but here's one of the inside of the card:

Here's the finished card featuring MFT's Adorable Elephants... love those little guys!
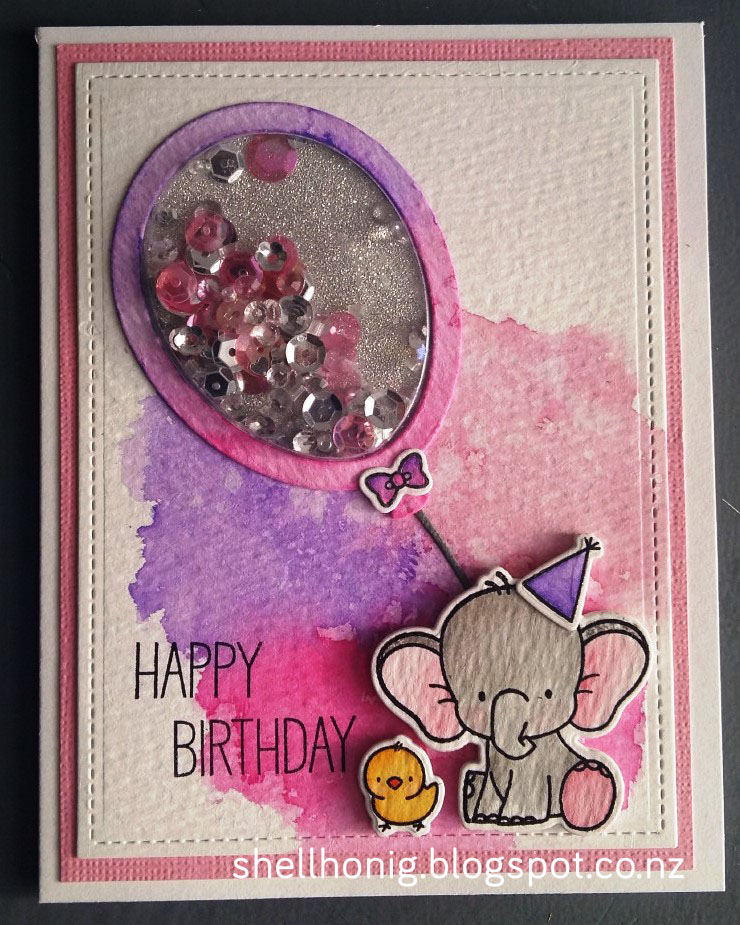
Here's a photo of all three cards together.  I really did love making these cards and I know they were all really appreciated by the recipients and their family :)

Thanks so much for stopping by today xx

Friday, 28 April 2017

Polynesian Paradise card

Hi there :)  I've been playing around in my craft room again... mostly because I got a new parcel of goodies that were just crying out to be used immediately!  It also helped that Nina came for a crafting visit :)

Here's the card I made using My Favorite Things - Polynesian Paradise stamps and dies:

I totally love how it turned out... and you'll definitely be seeing more cards made with this fabulous set of stamps and dies!  I took a few 'in the process' photos to share with you as well.

The stamps and dies from the Polynesian Paradise set actually arrived before Easter so I already had lots of pre-coloured (with my Zig Clean Colour Markers) and cut images ready to be used for this card but my new package of goodies had the leaf dies in them so I started with that.

First of all I grabbed some watercolour paper and inked it up with Bundled Sage, Twisted Citron and Mowed Lawn Distress Inks.  I did a bit of watercolouring first but then I realised I wanted something a bit more intense so I dropped the Bundled Sage out of the equation and did some ink blending with the other two colours... so much better!

Next I unpackaged by brand new Wild Greenery die set and die cut some leaves... this die cut so smoothly and the leaves looked awesome.

I added a bit more Distress Ink to the leaves once they were cut to give them a bit of a lift.

Then I started on the background.  I die cut a piece of kraft cardstock using my Lawn Fawn small stitched rectangles die... I use this die set ALL the time when I'm making cards.  Then I decided to use my brand new Diagonal Design Background stamp from My Favorite Things.  I stamped it with my new Kraft dye ink (also from My Favorite Things) and I really, really like the kraft on kraft effect... it's subtle but adds so much interest.

Now for the fun part... actually 'building' the card!  I die cut a circle from Itsy Bitsy Polka Dots paper pad using my new Inside and Out stitched Circle dies... I'll be using these ones again for sure!  Then I curved a couple of the palm leaves around the circle and adhered them in place.

Luckily at this point I realised that I wanted to stamp and emboss a sentiment on my card so I quickly did it before I added even more layers!

Then I literally started adding all my stamped elements until I was happy with the arrangement.  Some are stuck down with Multi Medium Matte and some have been adhered using thin foam dots.  I also added a 'googly' eye to the turtle before backing the whole thing with some purple cardstock.

Then I popped the entire card front onto a side fold card... but something was missing and I just couldn't figure out what it was...

.... oh yes, a 'googly' eye for the chameleon as well!  Here's another look at my finished card (with both 'googly' eyes in place).

So pleased with how it all turned out... and I even went on to make another card but by the time I'd finished it the lighting was terrible for taking a photo so I'll have to share that with you next time.

Here's a wee photo from my new craft room yesterday... thanks Nina for coming to visit :)

Thanks for stopping by my blog today xx

Tuesday, 25 April 2017

Happy Batty Birthday

I've got a bit of creativity to share with you today... this time in the form of a 'Batty' Birthday card.  I made this card for one of my nieces who really likes things that are a little bit different... and since it was for her birthday, I made a matching gift card holder which she was absolutely delighted with!

Here's the finished project:

I used some super cute bat stamps from Gerda Steiner designs - Bats:

Luckily for me I took photos while I was making this card because I've had a couple of requests to make more for other people... definitely helps when you can't quite remember what you did.  For those of you crafters out there that like to gather ideas from others... and don't we all???... I've got a little tutorial for you about how I made my card.

I started off with my MISTI and stamping my chosen bat image straight onto some watercolour paper.  After stamping my image I heat embossed it which is totally my favourite thing to do when I'm watercolouring.

Next I chose another one of the bats and stamped and heat embossed him onto the label for the gift card envelope which I made using Lawn Fawns small stitched envelope die.

Then is was time to make a mask for each of my bats using masking paper.   I love how easy masks are to use to get awesome results.

I fussy cut the bats out and then stuck them over my embossed images.

I wasn't quite done with the masking yet though... I decided to cut a moon for each bat since bats only come out at night.

With both masks firmly in place I started adding some colour using Spun Sugar Distress Ink.  I went in fairly close to the moon and the bats since this was going to be the lightest colour in my background.

Next came Shaded Lilac Distress Ink:

Followed by Picked Raspberry Distress Ink:

Then some Wilted Violet Distress Ink:

And finally, Chipped Sapphire Distress Ink.  As you do each layer you need to stop a little before the last colour so that there is a graduation of colour.

Now that all the inking was finished, I went ahead and added some water to a little bit of Pearl paint and then 'artistically' flicked it over the background.

Now comes the hard part... for me at least... let the paint dry!  I'll admit that I always want to get my heat gun out at this point, but I've found that with the pearl paint the heat gun seems to make it blend in with the background rather than stay pearly on the top of the ink.

I have a sneaky suspicion that Cookie Monster would have just gotten out the heat gun LOL

Once the paint is completely dry it's time to take the masks off the moons... leave the bat masks on for now!

I decided to try to add a bit on interest to the moons using Distress Ink and my water pen.  You can see the difference here between the altered moon on the card and the untouched moon on the gift card holder.

After a bit of experimenting I found the colours that worked best for me were Pumice Stone and Weathered Wood Distress Inks. 

Once the moons were both done I removed the masks from the little bats.  They looked super white!

I coloured the bats using Zig Clean Color Markers in the following colours: 090 Gray, 097 Pale Gray, 080 Violet, 082 Purple and 200 Sugared Almond Pink.

Next I stamped a sentiment on the front of my card and heat embossed it:

Since I had my embossing supplies out I also embossed some little bats onto the back of the gift card holder:

I backed the card front with black cardstock to match it in with the gift card holder and it certainly made the colours pop.

The sentiment on the card front reads: I bat you don't know... so of course I had to put something cute on the inside as well:

I took a quick photo with my camera when I'd finished and I love how it looks like the moon is really glowing!

Here's my finished card:


And here's another look at the set:

Thanks so much for stopping by my blog today xx