Showing posts with label Shaker card. Show all posts

Sunday, 3 September 2017

Shake, shake, shake... shaker cards!

Hi there :)

Remember when I was commissioned to make the space card for a little boy who was turning 3?  Well his younger siblings were celebrating their first birthday within a couple of days of him and I was asked to make their birthday cards as well.  Since they're twins I made cards that were 'the same but different'... here's the finished cards:

I made the wee boy's card first using MFT's Happy Hippos and Balloon Shaker Window die set.  I started off with a piece of watercolour paper that was die cut using my ever faithful stitched rectangles die... I think this must be my most used die I own!  I then watercoloured some Distress Ink onto the paper using the 'wet on wet' technique with Mowed Lawn, Blueprint Sketch and Fossilized Amber.

While I had the inks already on my craft sheet I used the rest of the ink to colour the die cut balloon frame... love how that turned out!

Next I die cut the opening for the shaker card... make sure you have a pretty good idea of where everything is going on your finished card so that you have room for everything... just saying LOL

Then it's time to start assembling the shaker card... this is the really fun bit!

Along with the Balloon shaker pouch from MFT I used some Ice Cube Jewels and Lagoon sequin mix from Little Things from Lucy's Cards.   I've got a growing collection of pretty things from this company and apart from looking cool in shakers they are also delightful to look at on my shelf... and I do like pretty things :)

I loaded up some of the sequins and the ice cube jewels into the shaker pouch and then ran some glue around the edge before sticking it down onto some glitter cardstock.  Multi Medium Matte is definitely my 'go to' adhesive for this kind of thing because it sets quickly and extremely securely!

The next step was to adhere the shaker pouch to the back of the card front using some more adhesive... that sounds more complicated than it should... take a look at this photo and you'll see what I mean:

Next I added the balloon frame and the 'string'.  At this point I also realised that I hadn't stamped my sentiment on the card front but thankfully the shaker pouch is relatively the same depth as the MISTI magnets so it wasn't even an issue. 
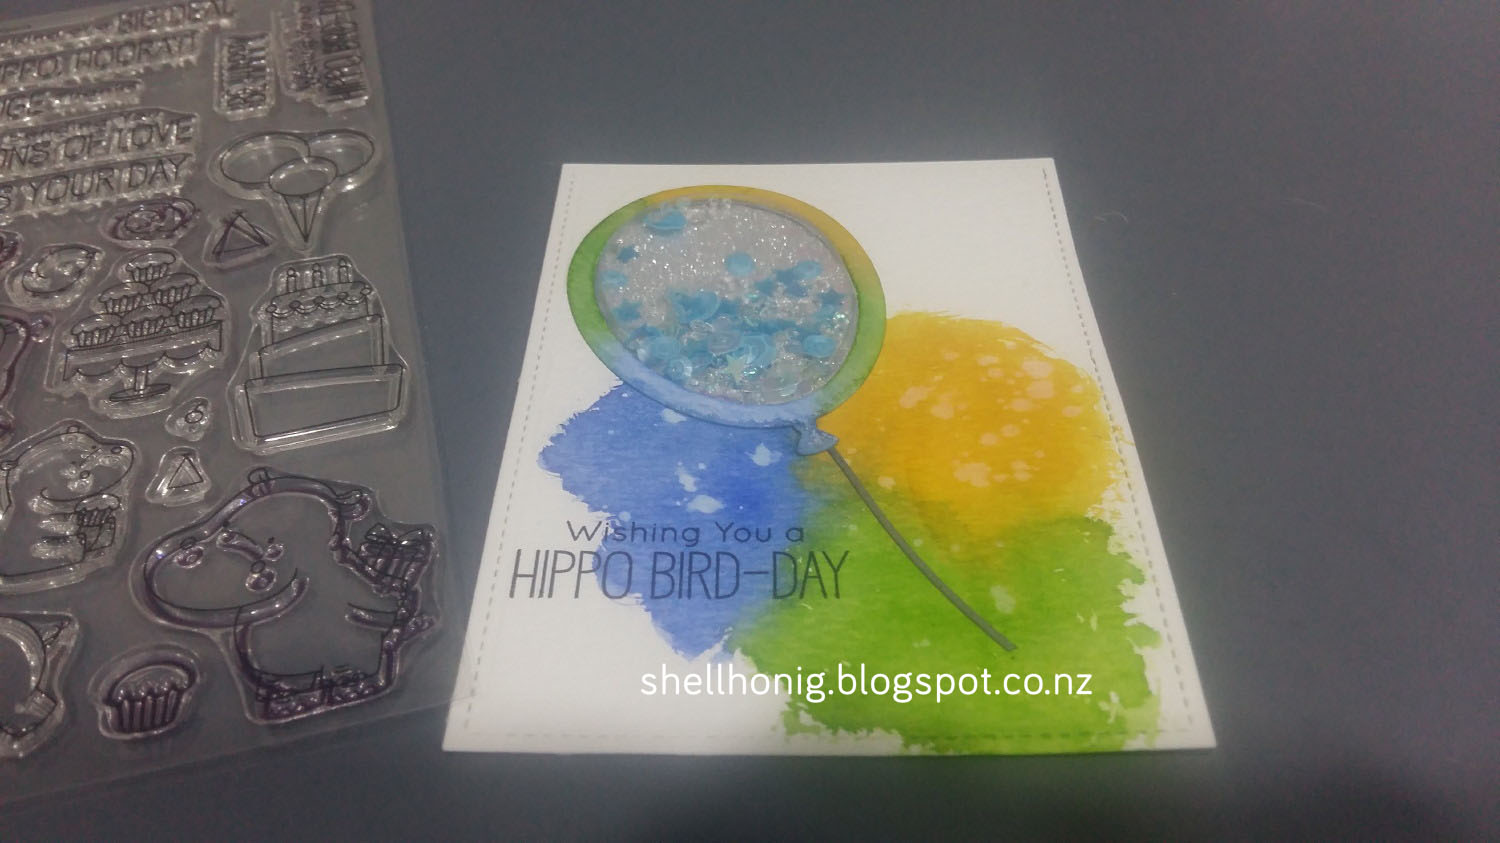
Time to add my pre-coloured images... a cute litte hippo and a wee bird.  I die cut some foam to give them extra dimension and it worked really well.  At this point, I layered the card front onto some dark blue cardstock which really made the colours pop!

I added another hippo to the inside of the card:

And here's the finished card:

And now for 'the same but different'... since I'd already worked out my basic design, the second card came together really easily.  Colour the watercolour card using Distress Inks - Picked Raspberry, Worn Lipstick and Wilted Violet. 

I coloured a balloon frame as well and die cut a window for the shaker pouch:

This time I used some more Ice Cube Jewels along with 'Magic Wand' sequin mix for the shaker pouch:

At this point Michael came into my craft room and I forgot to get a few of the photos I wanted but here's one of the inside of the card:

Here's the finished card featuring MFT's Adorable Elephants... love those little guys!
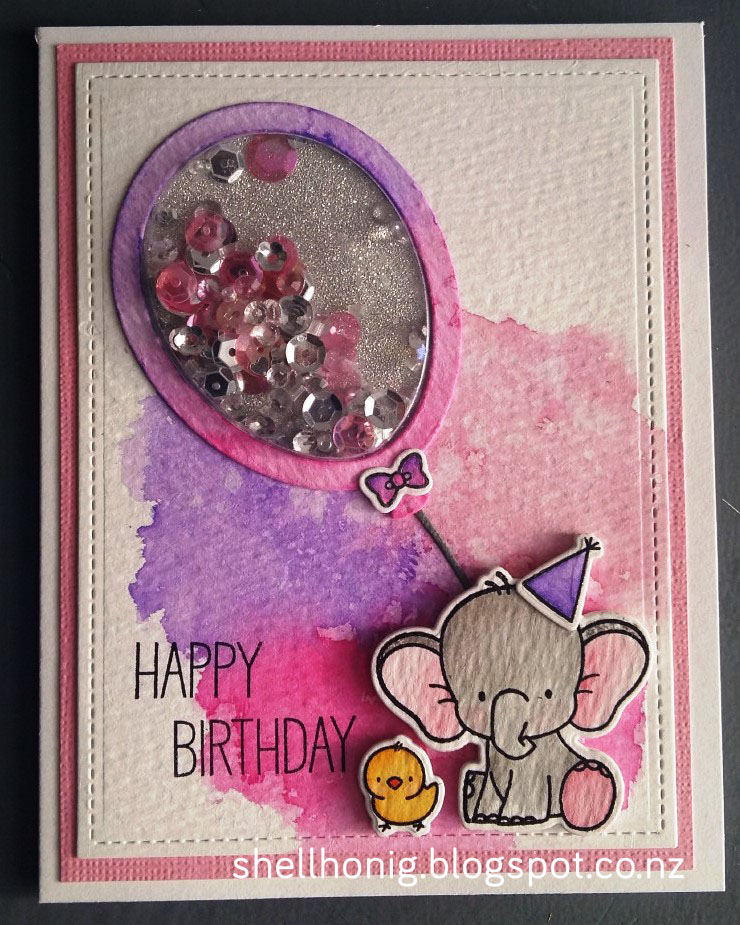
Here's a photo of all three cards together.  I really did love making these cards and I know they were all really appreciated by the recipients and their family :)

Thanks so much for stopping by today xx

Saturday, 26 August 2017

Space card... tutorial ... and a Chloe update

Hi there :)

Today I've got a card to share with you that I was commissioned to make.  It's for a little boy who is turning 3 tomorrow.  Let's start with the finished card which features a cool galaxy background, stamped images from Gerda Steiner Designs (Blast Off) and a shaker element... I'm super happy with how this all turned out!

I took lots of photos while I was making this card and I don't know if anyone else uses my little tutorials but I actually go back to look at them quite often to get ideas or remind myself how I did something.

Last time I made a galaxy background I used Distress Inks... you can check that one out HERE.  This time I'd seen a YouTube tutorial by Amy R using Gansai Tambi paints which I just happen to have in my stash so I thought I'd give it a go... and I LOVE how it turned out!!!

To be fair, the background doesn't look good until you get right to the end... but Amy warned me about that in the video tutorial and said to just keep going with it and I followed her advice... thanks Amy!

I've got my new computer (27 inch touch screen!!) set up on my crafting table and I couldn't be happier!  Watercolour paper taped down... paints ready...  video ready... Here we go....

Kinda liking where this is heading... the colours look really pretty.

Added in some more colour... oh crap!  Not liking it anymore!

"Keep going" said Amy... black added... oh my gosh... nope not liking it at all!

Hmm.. ok... it's looking kinda cool now...

Little flicks of pearlised paint for the stars... yep I'm definitely liking this now...

All dry and tape removed... oh yeah baby!  Wow... wow... wow... LOVING this!

Time to cut the background up... I started off with a 8 1/2 x 11 inch piece of watercolour paper and I got FOUR stitched rectangle backgrounds out of it... loving that too!

I had a bit of a vision in my head of what I wanted the finished card to look like so I die cut the hole for the shaker piece to fit into... die cut a stitched piece for the 'planet' and cut another piece of watercolour paper for the back of the shaker window.

Next I got out my Distress Inks and added some Pumice Stone and Hickory Smoke to create a moon and shading on the planet.


Time to make the shaker element... I used small star confetti from Pretty Pink Posh (6mm and 2mm) along with some clear Micro Beads... super fun!

I glued the shaker pouch to the watercoloured 'moon' background... let it dry... and then glued the shaker pouch to the underside of the card front.  I used Multi Medium Matte which took hardly any time to dry and it bonds really well.

Add the 'planet' along the bottom... still loving that background!

Then I die cut the Happy Birthday Circle Frame from glitter cardstock... I even remembered to add some Stick It to the back of my cardstock before I die cut it which made sticking the frame down super, super simple!

Then it was time to add my stamped and coloured image.  I decided to pop him up with some foam and it worked perfectly!  I've had lots of problems with the foam I've been able to get in New Zealand so I took a chance and bought some SugarPea Designs 'Sugar Puff' foam and it's FANTASTIC!  I stuck the image to the foam using some more Multi Medium Matte and it worked perfectly.

I popped the card front onto some blue cardstock and added the little spaceman using some more Multi Medium Matte.

On the inside of the card I added another little image from Gerda Steiner's Blast Off set and the sentiment is from Gerda Steiner Alien Invasion.

Here's another look at the finished card:

And of course I've already got three more galaxy backgrounds ready to go to make more space themed cards :)

Now for little Miss Chloe... or as my daughter has taken to calling her... Chubba Chub!  She now weighs in at just over 9lb 8oz and she is one month old!  Mikayla is loving motherhood and she is doing such a great job... super proud of my girl!  I will get to meet Chloe in the next school holidays (just over 5 weeks away) but in the meantime Mikayla sends me regular photos and video clips of what Chloe is up to... and we also Skype.

Check out this gorgeous wee face... she looks so surprised to see the camera LOL

How's this for beautiful:

Chloe is getting really good at holding her head up and trying to push with her feet too... I think she's going to be a crawler before we know it!  Here's a little video clip of my beautiful Grandbaby:


Thanks for dropping by today... wishing you all a wonderful weekend xx

Saturday, 5 August 2017

A couple of updates... and something creative

Hello there... well it's been quite a busy week (and a bit) and my wee Grandbaby is doing so well.  Mikayla has taken to motherhood like a duck to water and she sends me daily photos of what Miss Chloe is up to!  I've even had videos and we've talked on Skype... modern technology is really helping this Nana feel close to her Invercargill girls that's for sure.

How precious is this little girl???

She looks so much like Mikayla did as a baby... and those little lips and nose... super cute!  I know I'm biased but this little girl just melts my heart xx

Now up to the other end of the country and a quick update about my Dad.  Unfortunately things are not running quite so smoothly up in Whangarei.  Dad is still in hospital... and still on oxygen... and unfortunately he is having a LOT of memory problems.

Dad has no idea that Krystal and I went to see him in the hospital which is a real shame.  A friend of mine went to visit him early this week and by Thursday he had absolutely no memory of it.  It could be down to the skull fracture... but at this stage we just don't know.  I'll let you know more when I know more.

And now for something creative.  One of the boys in my class turned 8 last week and his family took him on a trip to the snow... so I decided to make him a 'snow card' and here's what I came up with:


I took step by step photos as I went so I might just put together a little tutorial for this one.

Thanks so much for stopping by xx

Sunday, 1 May 2016

A celebration and a shaker card!

Hi there :)  I woke up early this morning to discover the BEST kind of emails... blog comments about my cards!

One of them said: Congratulations on your honourable mention. I love these gnomes, they're too cute.

Honorable mention???  I headed straight to the blog post to see what it was all about!  Remember me making these cards for CAS(E) Challenge #169?

Well, today they announced the winners on the CAS(E) blog and I got an honorable mention!!!
Yes, I'm thrilled to bits!  Love those wee gnomes and totally enjoyed making my cards!

Speaking about making cards... I've been inspired by yet another card maker.  This card is a bit serendipitous actually... you'll see why in a moment.

A couple of days ago, Amy from Prairie Paper & Ink made a really cool shaker card.  I watched her video and was really intrigued by how she'd designed it... and even more happy because I had both the pockets she used and the Fuse tool in my art studio.

You can check out Amy's video on You Tube... I've subscribed to her channel and picked up TONS of hints and tips already!

I kept going back to Amy's video and I could feel an idea formulating.  Then I noticed the stamped images I'd done from my new Simon Says Stamp Warm Christmas Wishes set:

All of a sudden I knew EXACTLY what I wanted to create... a bon voyage card with a shaker insert filled with SAND!

This morning I dragged Michael out to Ngongotaha to help me collect some sand from the edge of the lake.  He immediately scooped down into the sand and came up with lots of damp sand which wasn't exactly what I was wanting.  He then helped me scoop up just the very top sand which was lovely and dry!

Since he was so helpful I took him out to breakfast!  Michael's actually been away for work for a week and only got home yesterday afternoon so it was nice to catch up over some pancakes and eggs Benedict!

Anyway, back to my card, after we got home I went straight into my art studio, stamped and coloured some more images using my Peerless watercolours and here's what I came up with:

It turned out that I didn't have a 'bon voyage' stamp in my supplies... but I did have a set that I had NEVER stamped before which included the sentiment 'make a splash'.  It was perfect for my card and actually probably makes it more usable because it could be used for anything now rather than just for a bon voyage card.

As I was looking at the stamp set I noticed a small logo at the top of the packet which said 'Amy R stamps'... it turns out that Amy from the video and Amy the stamp designer are one and the same!

See what I mean about serendipity?

My day is filled with lots of reasons to smile :)   Thanks for visiting my blog today xx