Showing posts with label NBUS. Show all posts

Sunday, 29 January 2017

I love you rainbow card - NBUS Challenge #9

Hi there :)

I decided to do a second card for Darnell's NBUS challenge #9.  You can see my first card HERE.  You'll probably remember that NBUS stands for Never Before Used Schtuff... basically it means to use schtuff never before used (virginal) on your creation. It can be something you've had for years or something you got yesterday.

My NBUS item is this really cool die that arrived in the mail on Thursday:
My Favorite Things - Stitched Rainbow Die-namics
An optional extra challenge was to do a bit of CASEing... (Copy And Share Everything).  I copied this next piece straight from Darnell's blog:

  • Note: The most essential element to CASEing is that you give the original artist credit. If you don't know the artist because you found the card you are CASEing on Pinterest, etc., then include a link to your source.
I had seen a card on pinterest using a rainbow die similar to this which I really liked.  This card was made by Toni.  I quite like her blog and recommend it if you're a card maker.

So... with my new rainbow die in hand and a photo for inspiration I got ready to create.  Toni used a cloud embossing folder to create her background but I did something a little different.  In my Lawn Fawn - Blue Skies die set there are a couple of puffy cloud dies that I thought would be perfect for the background.  

I die cut lots of the clouds from watercolour paper and made sure that I had some going off the edges.

Then I got to work on my rainbow.  I started off by die cutting the rainbow from watercolour paper:

Then I separated each arch from the rainbow and coloured them using my Peerless Watercolours.  My rainbow die cuts one less arch than Toni's so I just combined the indigo/violet into one.

I dried the pieces with my heat gun and then reassembled the rainbow... love how it turned out.

Since I had the stitched lines in the rainbow I decided to use my Lawn Fawn - small stitched rectangles die to die cut the cloud background.  (Sorry I forgot to get a photo of this stage).  Then of course I wanted the edge of the rainbow to have the same stitching so I lined it up carefully and used some Micropore tape to hold the rainbow in place so that I could run it through my Big Shot.

Before I adhered my rainbow to the cloud background I did the colour runs using the same colours I'd used to watercolour my rainbow.  Peerless Watercolours: Red (Scarlet Lake), Orange (Deep Yellow), Yellow (Daffodil Yellow), Green (Grass Green), Blue (Alice Blue) and Purple (Amethyst)

Then I lined up my rainbow and adhered it using foam dots to give it a bit of height.

Next I layered my card front onto some black leather-textured cardstock and die cut a sentiment using Lawn Fawn - I Love You Border die from the same black cardstock.

For the finishing touch I adhered a tiny red rhinestone for the 'tittle'... yep that's the fancy name for the dot above the i!

Side note: My mum came over for a visit on Friday/Saturday and I was showing her the Quick Stick tool.  She was totally amazed at how easy it was to use... especially when she saw me stick down a tiny rhinestone with no issues at all... so off we went to Warehouse Stationery and now she has her own Quick Stick... I'm such an enabler LOL

Here is my finished card for Darnell's challenge:

Thanks so much for stopping by today xx

Tuesday, 24 January 2017

A NBUS challenge!

Hi there :)

My post today is for Darnell's NBUS Challenge #9.  (Never Before Used Schtuff)... basically it means to use schtuff never before used (virginal) on your creation. It can be something you've had for years or something you got yesterday.

As an extra optional theme Darnell also challenged us to use CASEing, (Copy And Share Everything).  I copied this next piece straight from Darnell's blog:
  • Note: The most essential element to CASEing is that you give the original artist credit. If you don't know the artist because you found the card you are CASEing on Pinterest, etc., then include a link to your source.
http://www.djkardkreations.com/2017/01/nbus-challenge-9.html

I was in my craft studio yesterday creating some cards that fit this challenge PERFECTLY... inspired from someone else's work AND using something brand new to my stash!

When I'm purchasing new products I usually see the product and instantly have ideas for how I'd use it but with this purchase I actually saw a finished card and said... I HAVE to buy that die!  Here's what inspired my purchase and my CASE'd card:
 
From Simon Says Stamp


I ordered this die as soon as I saw it because I really love this card (although nobody is credited with it on the Simon Says Stamp website).  I loved all the background colours and I instantly thought of using Distress Inks to create a similar look.

I got so busy playing around with different things that I forgot to take any photos at all but here's what I came up with using Distress Inks for the background.  I also added tiny coloured rhinestones to the flower centers  and the sentiments were cut from black cardstock using  Greeting Top Edgers dies from Impression Obsession.


In all honesty, this die does all the work for you!  It's a fabulously quick way to make a stunning card! Here's a better look at the die:

After making a couple of colourful cards I started thinking about making something a little more stylish and here's what I came up with:

I LOVE how glittery that silver cardstock is and it photographs so beautifully.  All I did was run the black cardstock through my Big Shot with my Lawn Fawn stitched rectangle die.  Then I ran it through again with the Heart of Flowers die.  Next I adhered my piece of silver glitter cardstock underneath and added it all to the front of my card.  Finally I added some clear rhinestones to the flower centers and heat embossed a sentiment.  Super simple but really stunning in real life.

Here's a group shot of my afternoon's work:

Thank you Darnell for the challenge... I totally loved participating :) 

Thank you for visiting my blog today xx

Saturday, 11 June 2016

A Gnome on the roam!

Hi there :)  Last weekend I woke up with a 'roaming gnome' on my mind.  While I was tidying up some of my supplies I stumbled upon a NBUS (Never Before Used Schtuff) stamp set... Tim Holtz' Cityscapes.  I vaguely remember purchasing this stamp set but clearly whatever idea I'd had when I bought it had slipped from my mind!  I decided to have a go at something a little different so here's how it went.

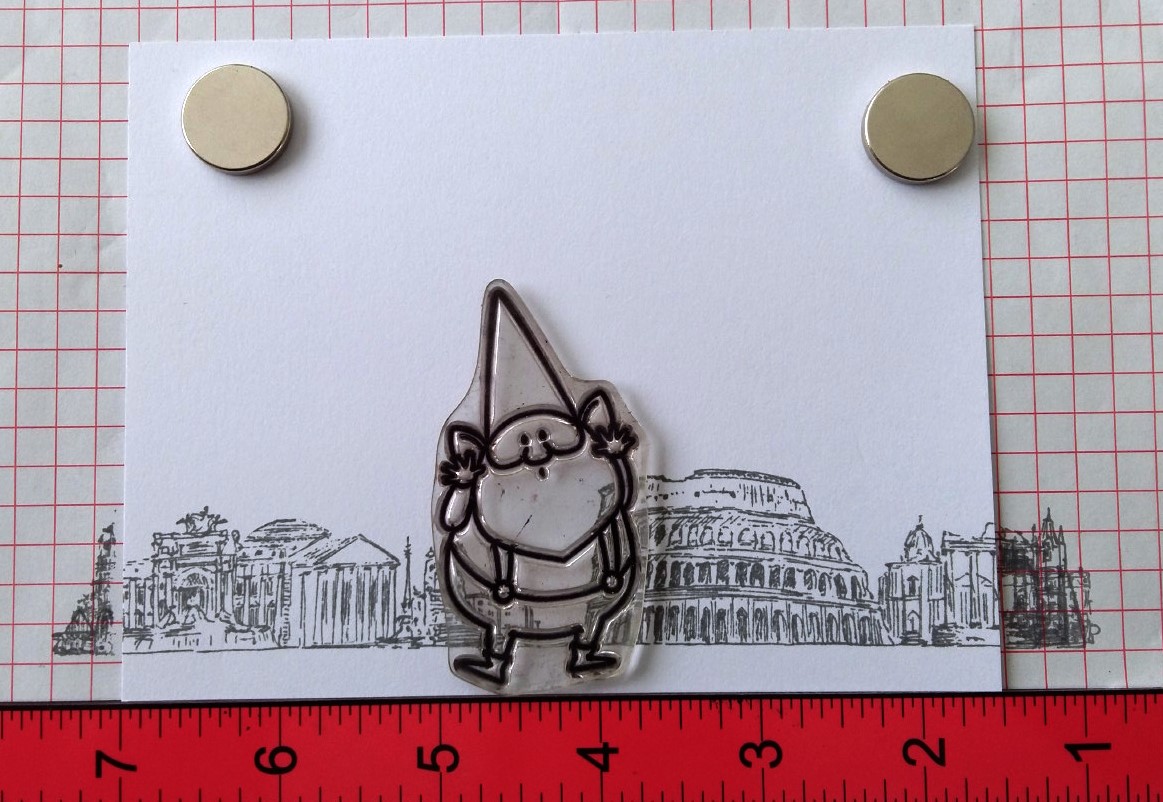
I started off by stamping each of the cityscapes onto some plain white card using Rangers Cool Graphite ink so that it had a 'soft' feel to it.

Next I grabbed one of my gnome stamps from My Favorite Things You Gnome Me.  I like the little guy with 'jazz hands' because he looks like he's waving.  Since I wanted the cards to be a set I placed my gnome in the MISTI and then I moved the backgrounds left and right until the gnome was in the right place for each individual cityscape.

I stamped the gnomes onto some watercolour paper since I wanted to do quite a few techniques on the cards.  It actually didn't take long to get them all stamped and heat embossed.  You can see the individual cityscapes sitting underneath the gnomes so that I knew which backgrounds were going onto each gnome.

Next I got out my masking fluid and carefully painted over all of the gnomes.  It's surprisingly easy and it worked even easier with the embossed images.

I left the gnomes to air dry... it's super easy to tell when the masking fluid is dry because it changes to a more yellow colour.

Next it was back to the MISTI.  I put each individual background back into the MISTI and lined it up with my previous stamped image.

Then I placed each stamped and masked gnome into the MISTI to give them their backgrounds which I stamped with the Ranger Cool Graphite ink.

Using the plain card images certainly made the stamping process much easier and I was thrilled when each card front turned out perfectly!

Now for some colour!  I did a bit of a wash over the background images with Pumice Stone and Weathered Wood Distress Inks.

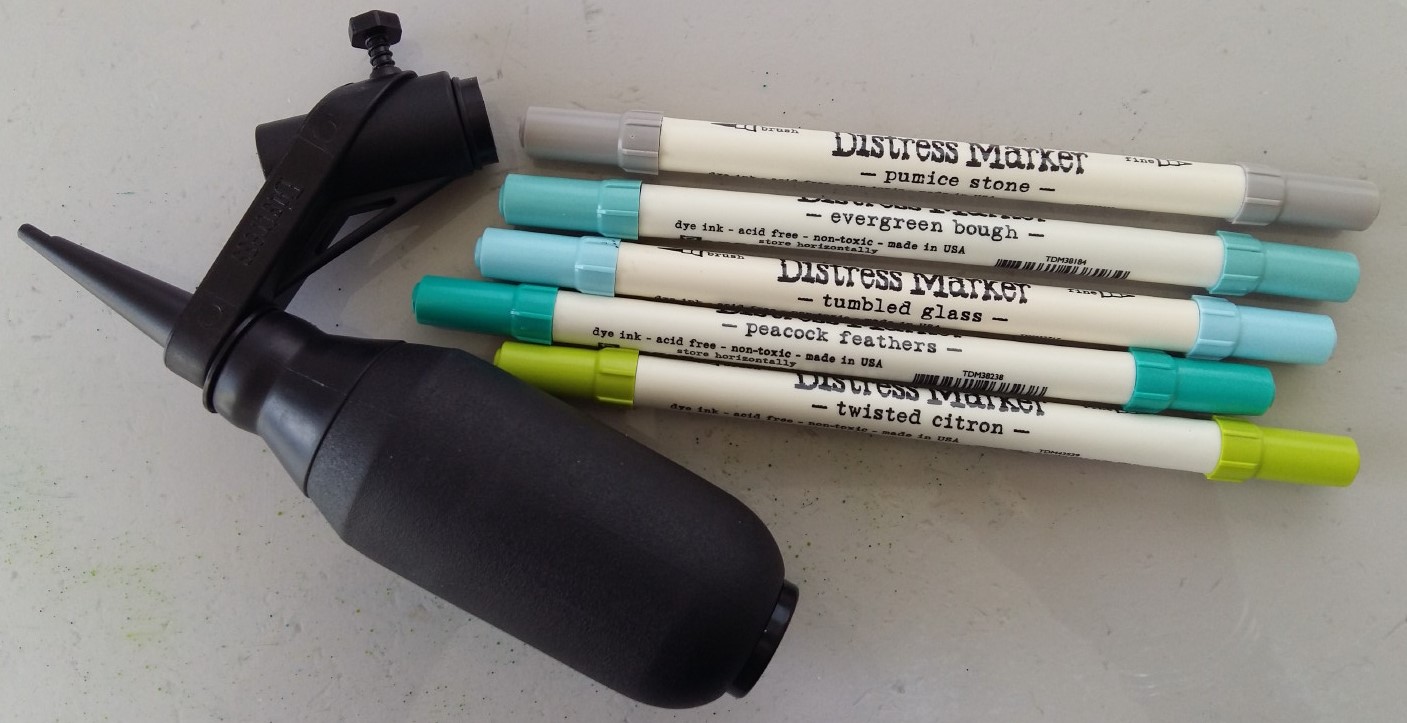
Then for something completely different I opened my brand new Distress Ink spritzer tool.  I was actually super lucky when I went to purchase mine because it scanned up at HALF the price on the ticket!  Yay!!!  I chose quite a few colours to give a light mist with: Pumice Stone, Evergreen Bough, Tumbled Glass, Peacock Feathers and Twisted Citron Distress Markers.

I was thrilled with the effects... and super pleased that I practiced on a bit of scrap paper first too!!  I didn't want to colour in the cityscapes... I just wanted to give a bit of colour to the overall background.

Once I was happy with the background I gave it a quick blast with the heat gun and then it was time to unmask the gnomes.  I had a bit of a 'learning curve' with this... I did my first gnome:

BLAST... bugger... damn... ink where I DIDN'T want it!  You can see it on his cute little gnome face and on his pants.

I couldn't figure out WHY I was getting ink on my card... especially since I'd dried it with the heat gun... and then I figured it out... the ink was sitting on top of the masking fluid!!  DUH!!!

I grabbed a paper towel and dried all the ink off the next gnome:

Then I removed the masking fluid and VOILA... no ink where it shouldn't be!!

Not to panic about the first wee gnome... I just painted over the ink that was on the gnome with my water brush and then used some paper towel to 'lift' the colour and it worked perfectly.

Here's my unmasked gnomes all ready for their colour to be added:

By the time I'd done all of these card fronts it was getting a bit cold in my art studio... there is a definite drop in temperature around 3.30pm!  I took my wee gnomes upstairs along with my Peerless watercolours and added some Flesh Tint to all their faces, hands and ears.

That brought my Queen's Birthday weekend to a close and my poor wee gnomes sat on the table for the entire week waiting to get their clothes!  I'm happy to report they are now fully dressed but I'll show you that in my next blog post.

Thanks for visiting xx
     

Monday, 30 May 2016

Flowers and sequins and gems... oh my!

Hi there :)  I've got a new card set to show you today.  After making Krystal's birthday card, I decided that I'd like to make some similar cards for a card set.  I remembered that I have some fantastic sentiment stamps from Kaisercraft that I'd never used before so this totally fits into Darnell's NBUS  (Never Before Used Schtuff) criteria!

I decided to enter my cards into the Addicted to CAS (Clean and Simple) Challenge #89 because the code word for the challenge is PETALS and my cards have really pretty petals!

So... back to the beginning... here's the stamp set: Kaisercraft You - there are 4 separate stamps in the set and I love the bold writing... it kind of reminds me of Subway Art.

I started off with a piece of Distress watercolour cardstock which I ran through with the Lawn Fawn stitched border die.  Then I cut 1/2 inch off the right hand side - this was totally pre-planned after watching Amy's video:

I loved what Amy did with the patterned paper and embossed strip so I used her idea for my card.

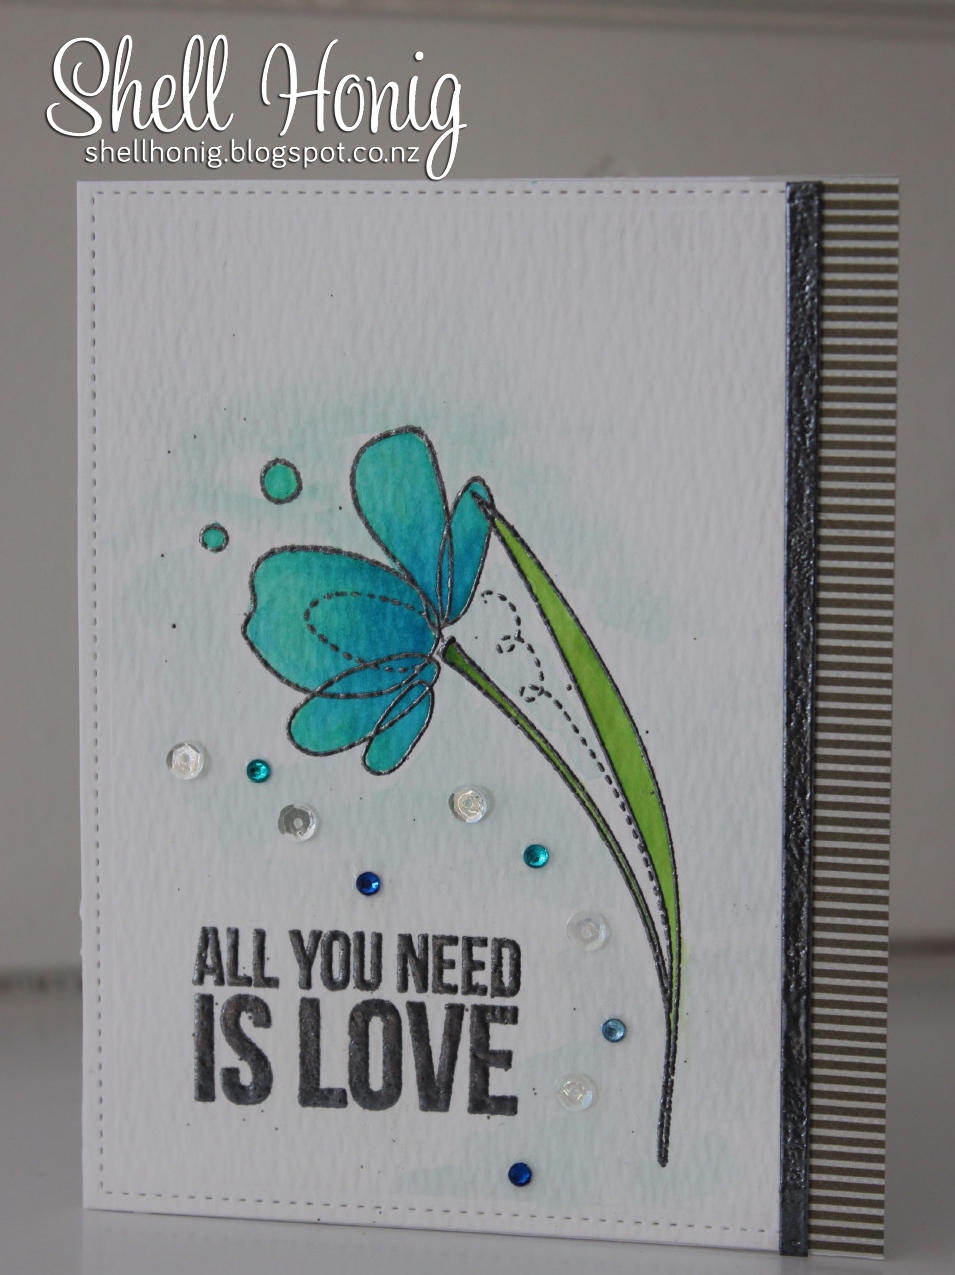
Once my watercolour paper was ready I chose one of the sentiment stamps along with the stalk of my chosen flower from Simon Says Stamp - Spring Flowers.  I stamped the images with Versamark ink and then heat embossed them with Zing Pewter with metallic finish.

Since I was using my MISTI I went ahead and did all four sentiments and stalks at the same time:

The pewter embossing is actually a lovely colour... darker than silver but with lots of depth!  Next up, I stamped and heat embossed all the flowers and 'bubbles':

I decided to add colour using Distress Inks so I chose Mowed Lawn for all the leaves/stalks.  The flowers were coloured using Salty Ocean, Shaded Lilac, Peacock Feathers, Cracked Pistachio and Picked Raspberry.  I used two colours for each flower and blended them using my water brush.

When I was happy with my flowers and stalks/leaves I added some Evergreen Bough Distress Ink with LOTS of water to create some subtle shading in the backgrounds.

Then I added some striped pattern paper from Kaisercrafts After Five collection along with the pewter embossed strip... LOVE how smart it looks!

By the time I'd done all that the rain and dark, thundery clouds had come for a visit so I called it a day.  This morning I came back down to my art studio and decided that the cards looked pretty good... but that they needed a finishing touch!  So... out came the sequins and rhinestones... oh my!

Here are the cards:


Here are my cards all lined up on the shelf above my desk (if you click on the photo you'll get a much better look!)

Thanks so much for visiting my blog today xx

Saturday, 28 May 2016

Miss Krystal is 24 today!

Today my 'big girl' celebrates her 24th birthday!

Krystal's birth was actually quite eventful.  My ex-husband and I had just bought our first home and moved into it.  I knew I was supposed to take it easy since I was so late in my pregnancy but I figured that if I got everything sorted out for the 'baby' (we didn't know if we were having a boy or a girl) then I could rest and take it easy once everything was done.

We moved into our home and spent all weekend rushing around organising things and getting boxes unpacked... and then the baby stopped moving!  I was ordered to go home and put my feet up... which I actually did!... but by the next afternoon there were still no movements from baby so my midwife said that I needed to go to the hospital to monitor baby's heart beat.

After several hours on the monitor it was decided that it would be best if baby came early... she was actually due June 16th!  They induced me and we got ready to be parents.  Mum and my two younger sisters arrived during the labour.  After saying I didn't want Mum in the delivery room all through my pregnancy she arrived at the hospital to hear me say she could come in.  Little did I know that one of my sisters actually watched the entire labour and birth from the window in the hallway!

Just after midnight my youngest sister called out from the corridor that 'if I waited 24 more hours the baby could be born on HER birthday'... and I remember yelling back to her that 'I didn't want to wait 24 more minutes let alone 24 more hours!'

As it was, Miss Krystal was born just after 1.30am and she and my sister have been 'almost twins' ever since LOL

Here's a very early photo of Miss Krystal (I think she was just a few weeks old):

Krystal has always loved girly, pretty things... along with anything sparkly, pink or purple so I decided to try and make her a special card to celebrate her special day.

I have to admit that I stamped and coloured a couple of images onto scrap watercolour paper first but wasn't entirely happy with them before I finally settled on my card design.

I picked a piece of patterned paper from Kaisercraft's 'After Five' collection.  I really liked the varnished feel of the paper and it was super neutral in terms of colour.  I die cut the card front using my Lawn Fawn stitched rectangle dies and then used some of the left over paper to die cut the word 'birthday' using Tim Holtz Celebrate dies.

Then I used the die cut 'birthday' to help me place the 'happy' stamp.  This stamp comes from Simon Says Stamp and it stamps perfectly every time.

The next job was to place the stamp for the flower stalk.  I decided to use Simon Says Stamp's Spring Flowers set.  I bought this stamp because it was so pretty but hadn't actually used it yet so it counts as being NBUS (Never Before Used Schtuff)!

I decided to stamp using Versa Mark and then heat emboss with silver embossing powder to try and match in with my patterned paper.

Once the stem, flower and bubbles were all heat embossed, I coloured the images using Faded Lilac, Picked Raspberry and Mowed Lawn Distress Inks.

I totally adore how the Faded Lilac and Picked Raspberry inks blended together on the flower... super pretty!  I did get some darks and lights too by simply drying the coloured image and then going back and adding more colour on top.  Very simple but also very effective!

Next, I adhered the coloured watercolour cardstock card front to the Kaisercraft patterned paper.  The photos don't clearly show the lovely pattern, or the varnish finish, of the paper.

Of course I had to add the 'birthday' die cut that I'd made earlier:

Since Krystal loves 'sparkly' things... and since I've had a bit of a thing for sequins and rhinestones lately I decided to add some to the card and here it is all finished:

I wish I could show you just how sparkly and pretty it all turned out but I'm really loving this card and hopefully Krystal will too.  She's at work right now but we're taking her out for dinner tonight to celebrate her day.

Thanks so much for stopping by xx